If you’re looking to speed up bank creation in Reverberate 3, this post is for you!
I’m very pleased to know that many of you have been creating Reverberate 3 banks for your huge impulse response collections of classic reverbs from Lexicon, EMT, TC, AMS and many more. If you have found that it can be a bit labour intensive working through each impulse response and naming the presets then I would like to show you some workflow improvements available in the latest Reverberate 3.1.1 update which should speed things up for you.
You can still do it the way you have been doing by using an empty bank and setting the impulse response in each of the 48 presets then giving each a name, but now there is a semi-automated technique to help which I’ll describe in this post first in the general case and then by example.
Bank Auto-Population Procedure
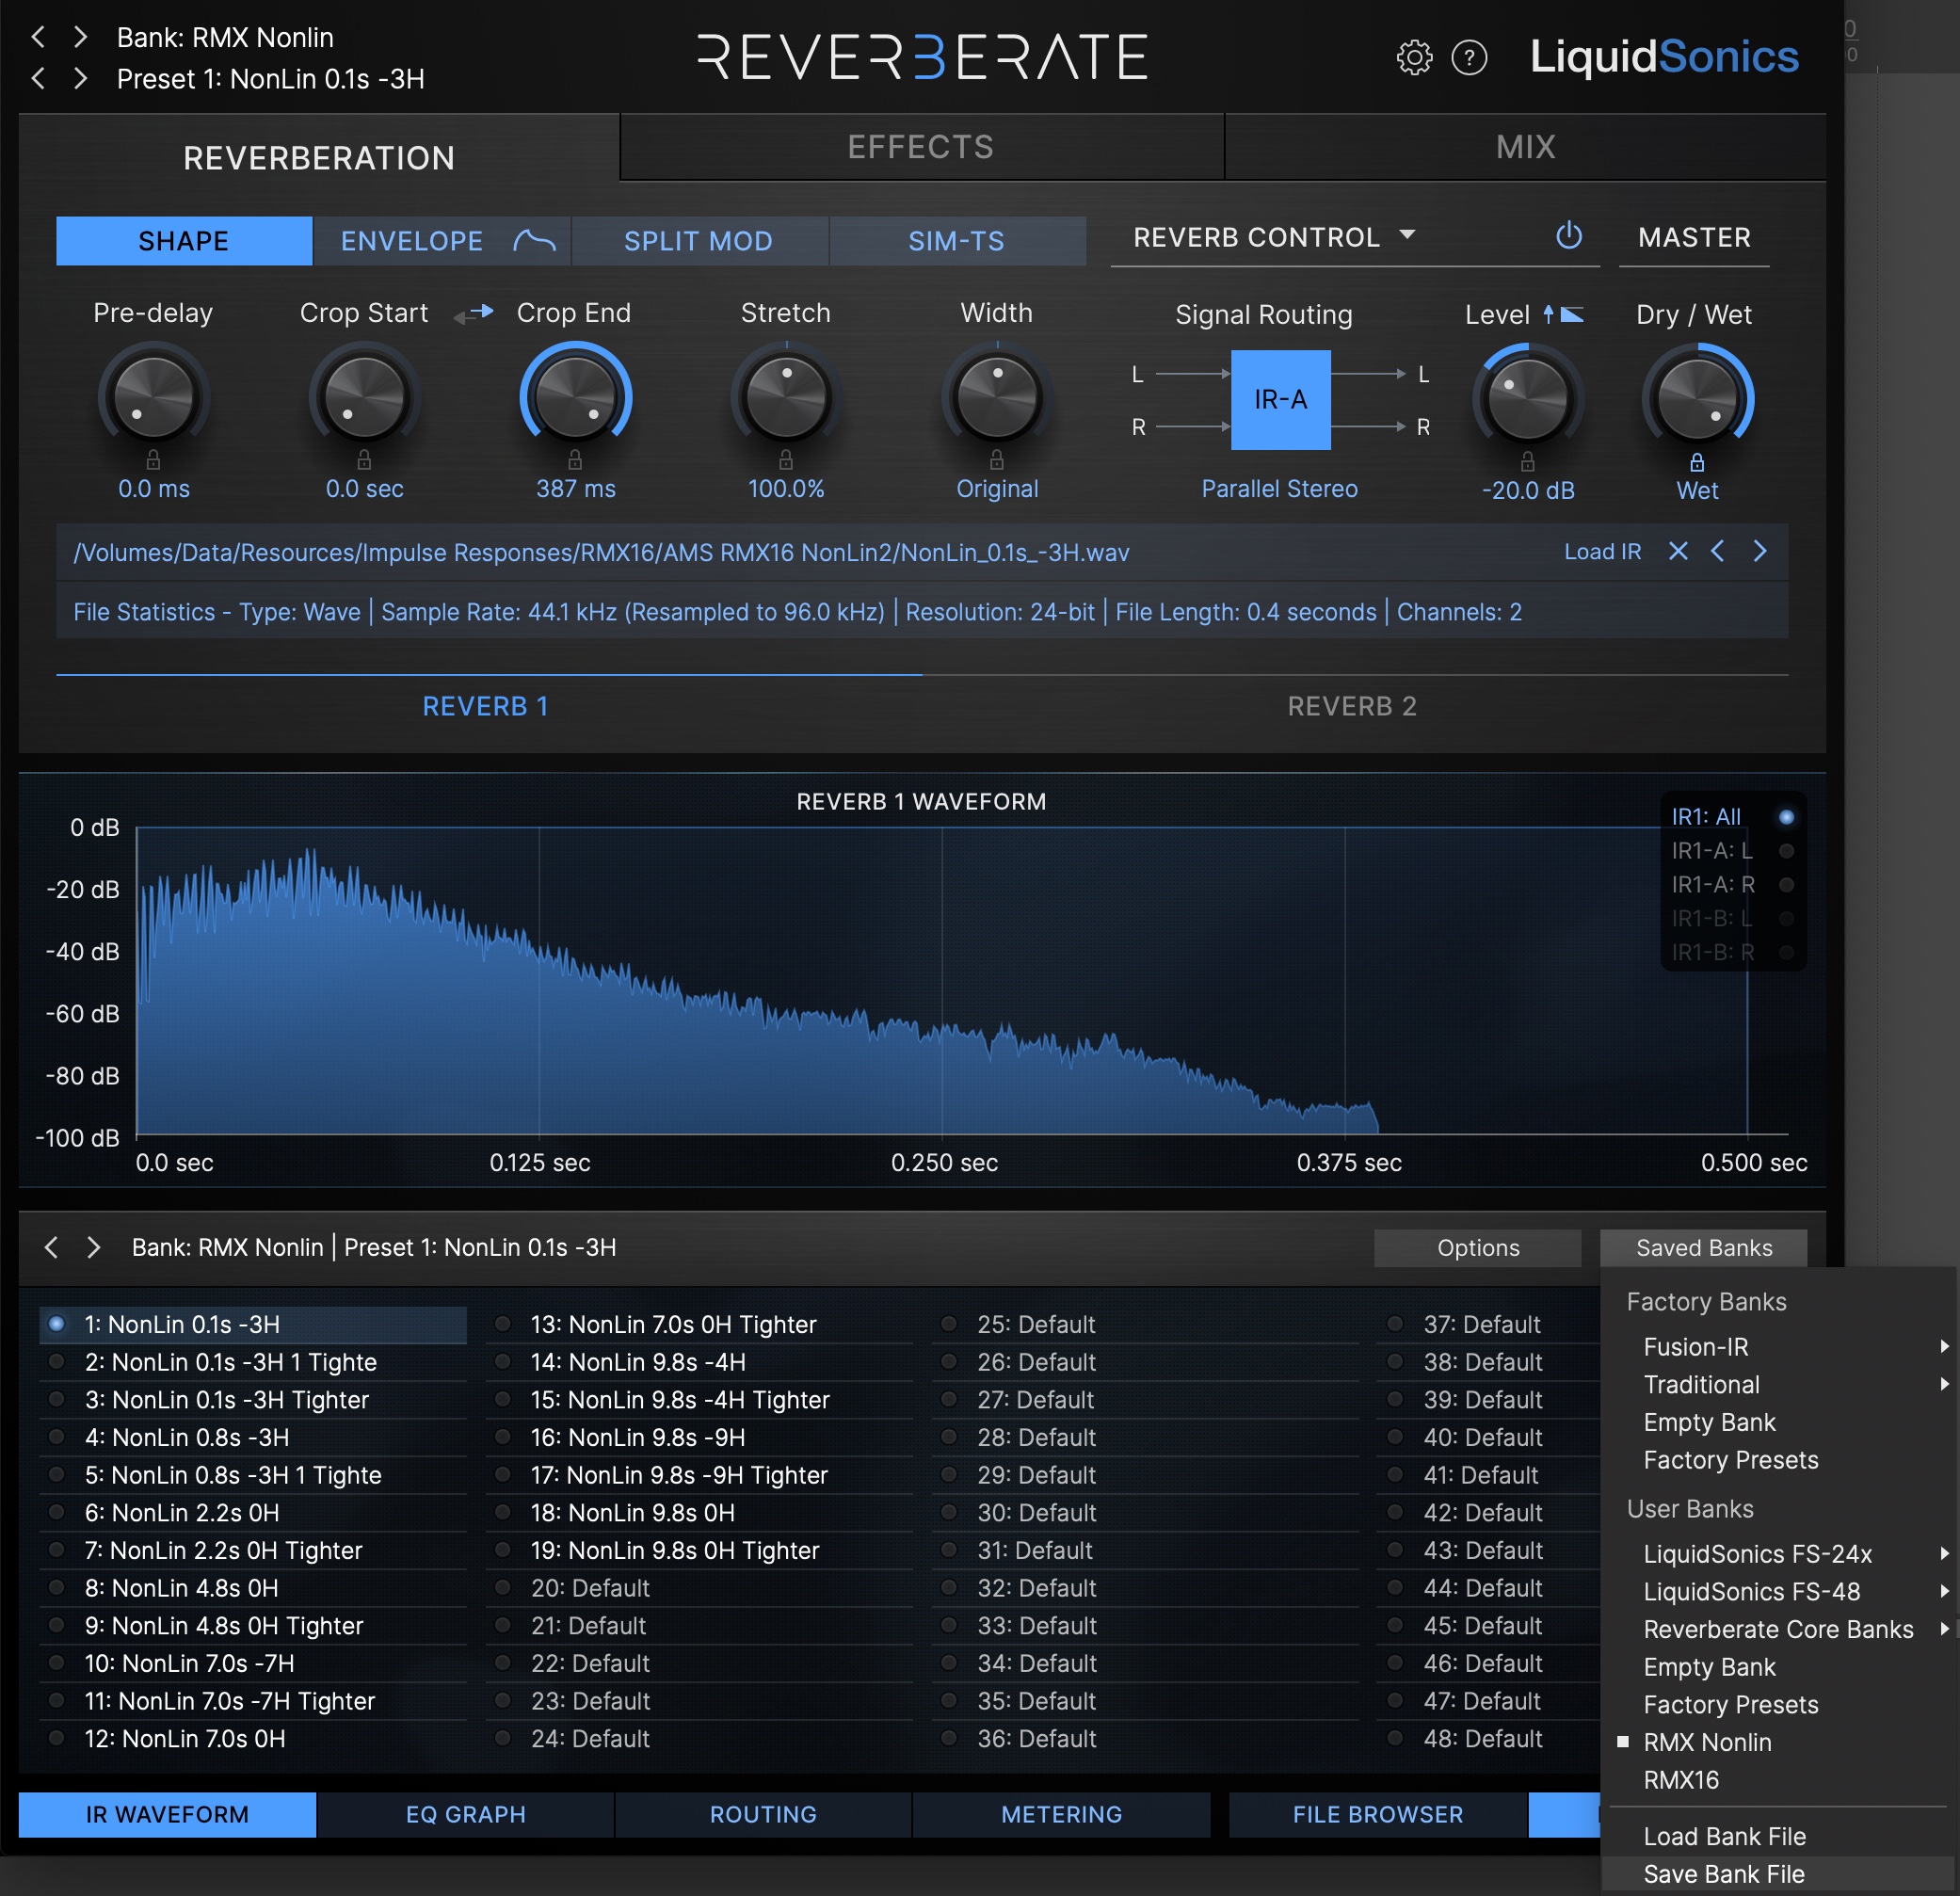
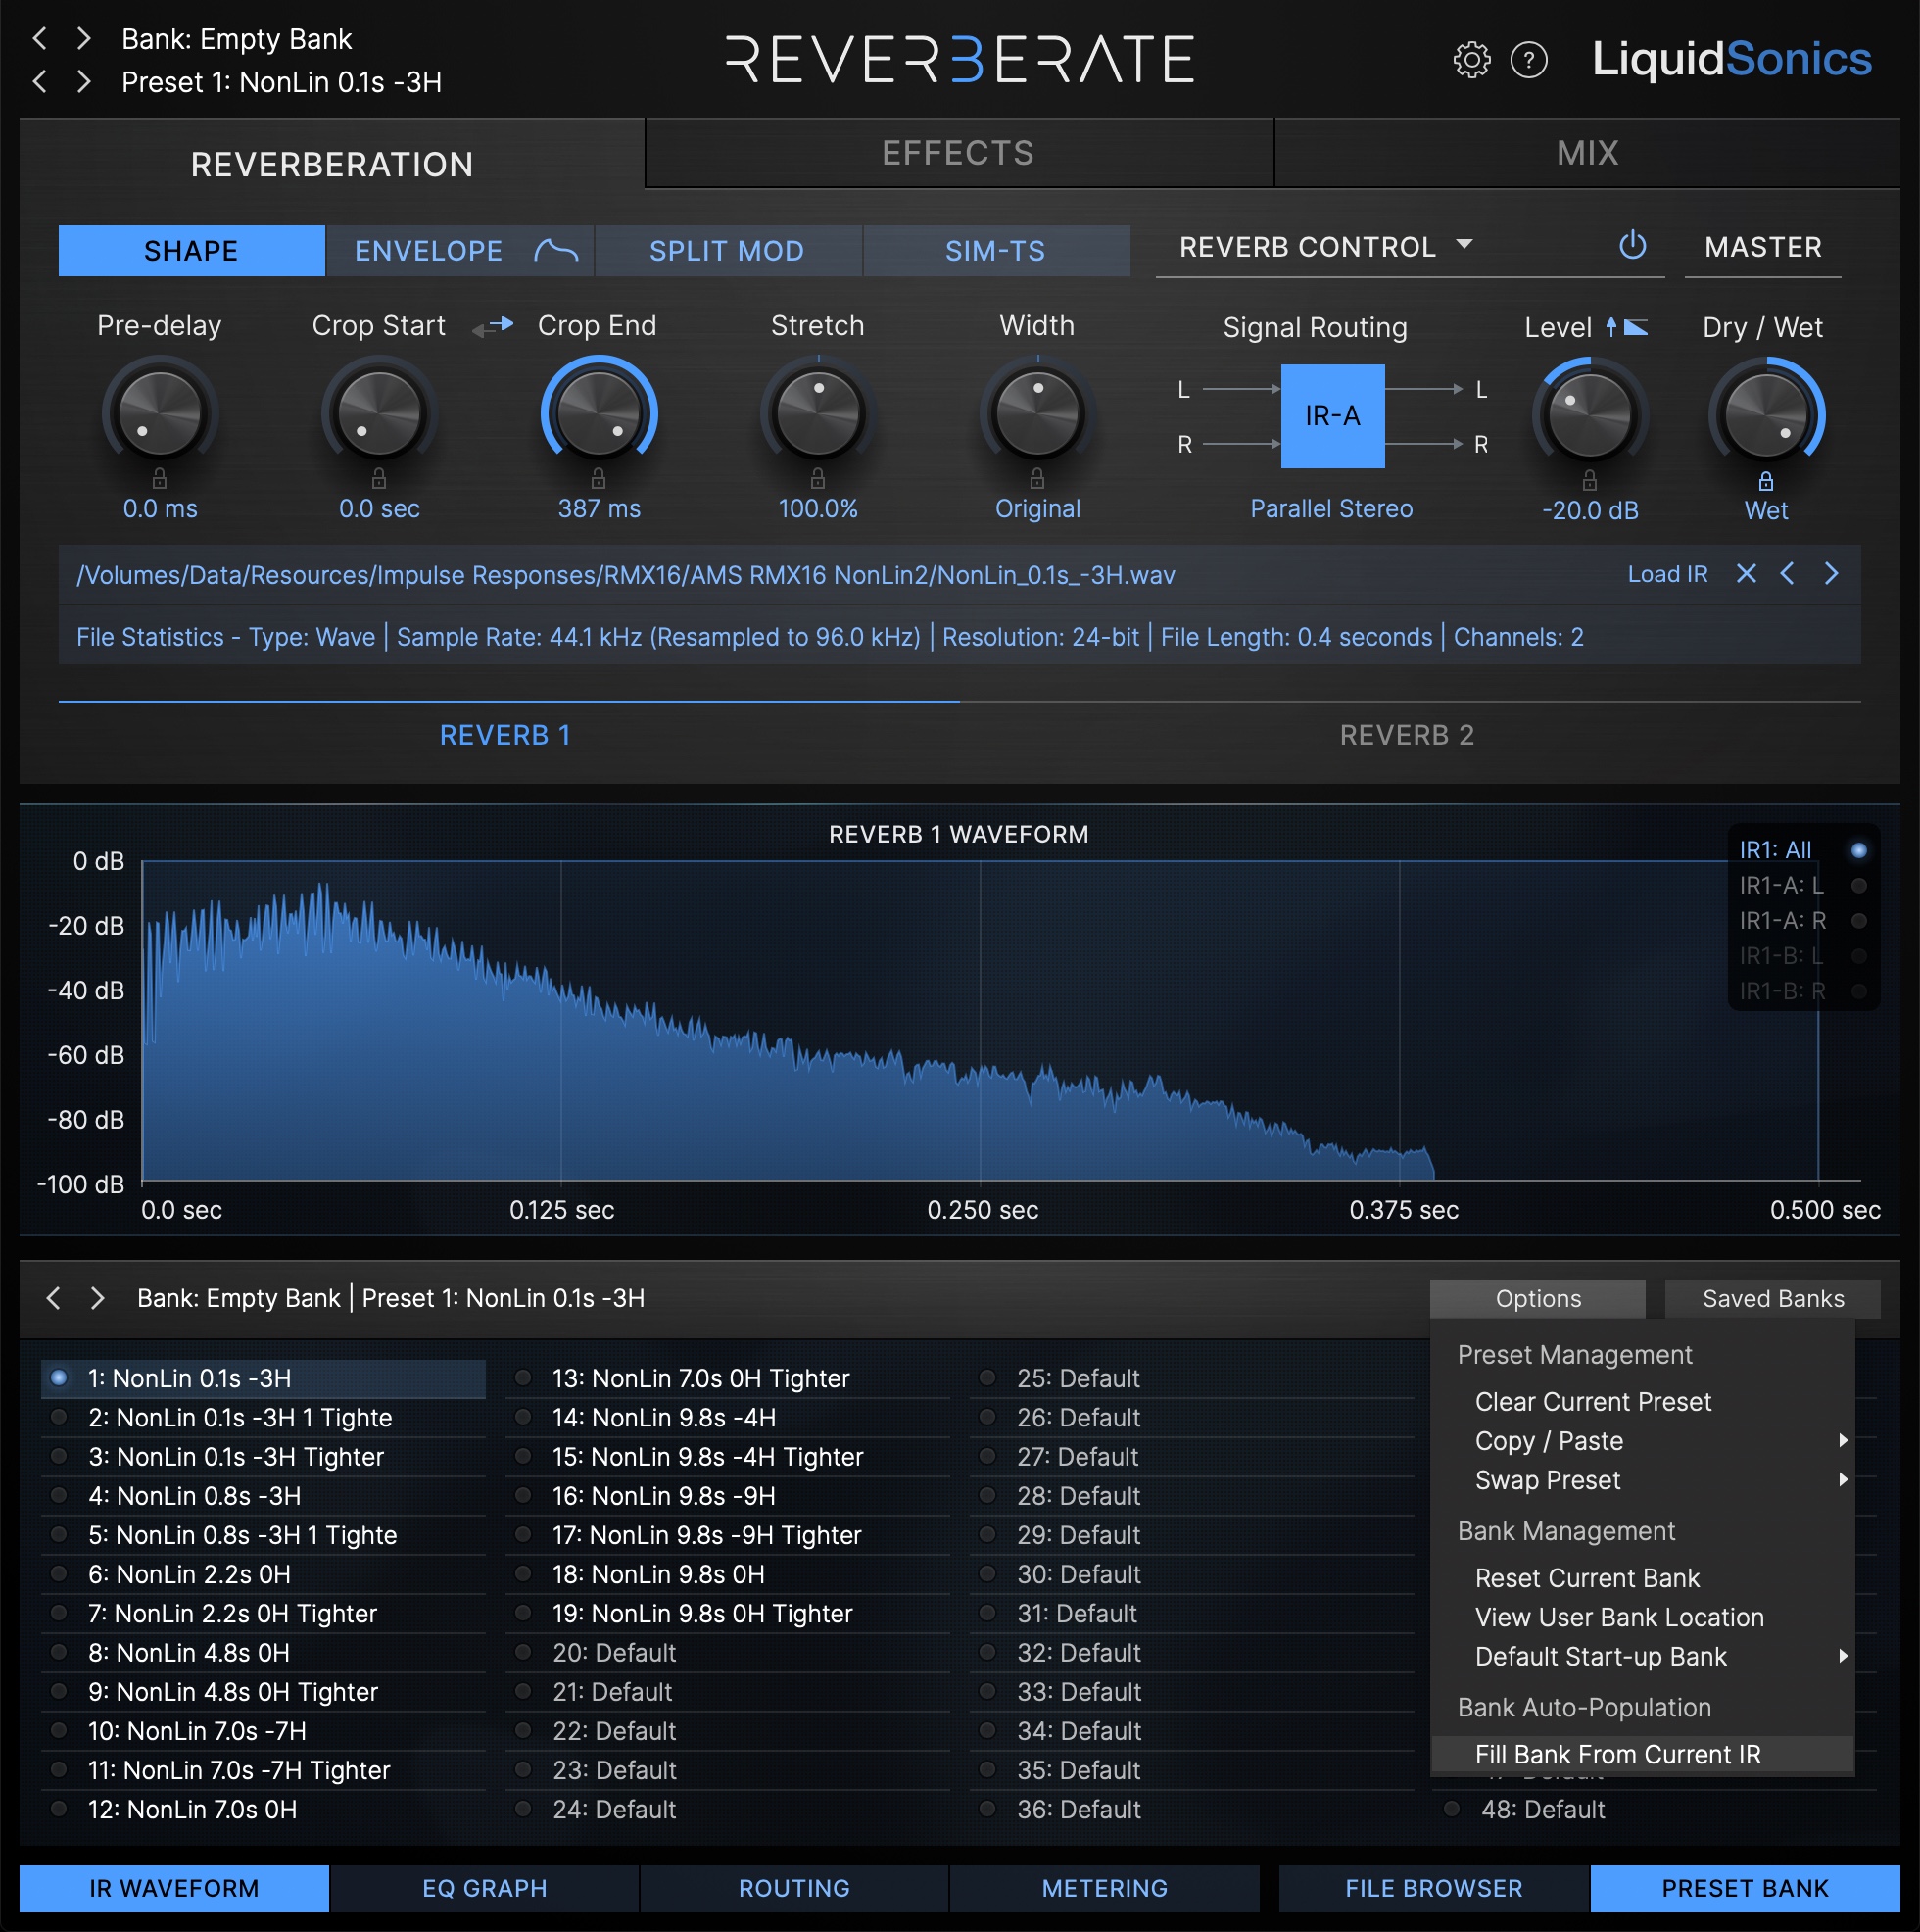
1. Start by opening the plug-in’s “Preset Bank” tab in the lower right.
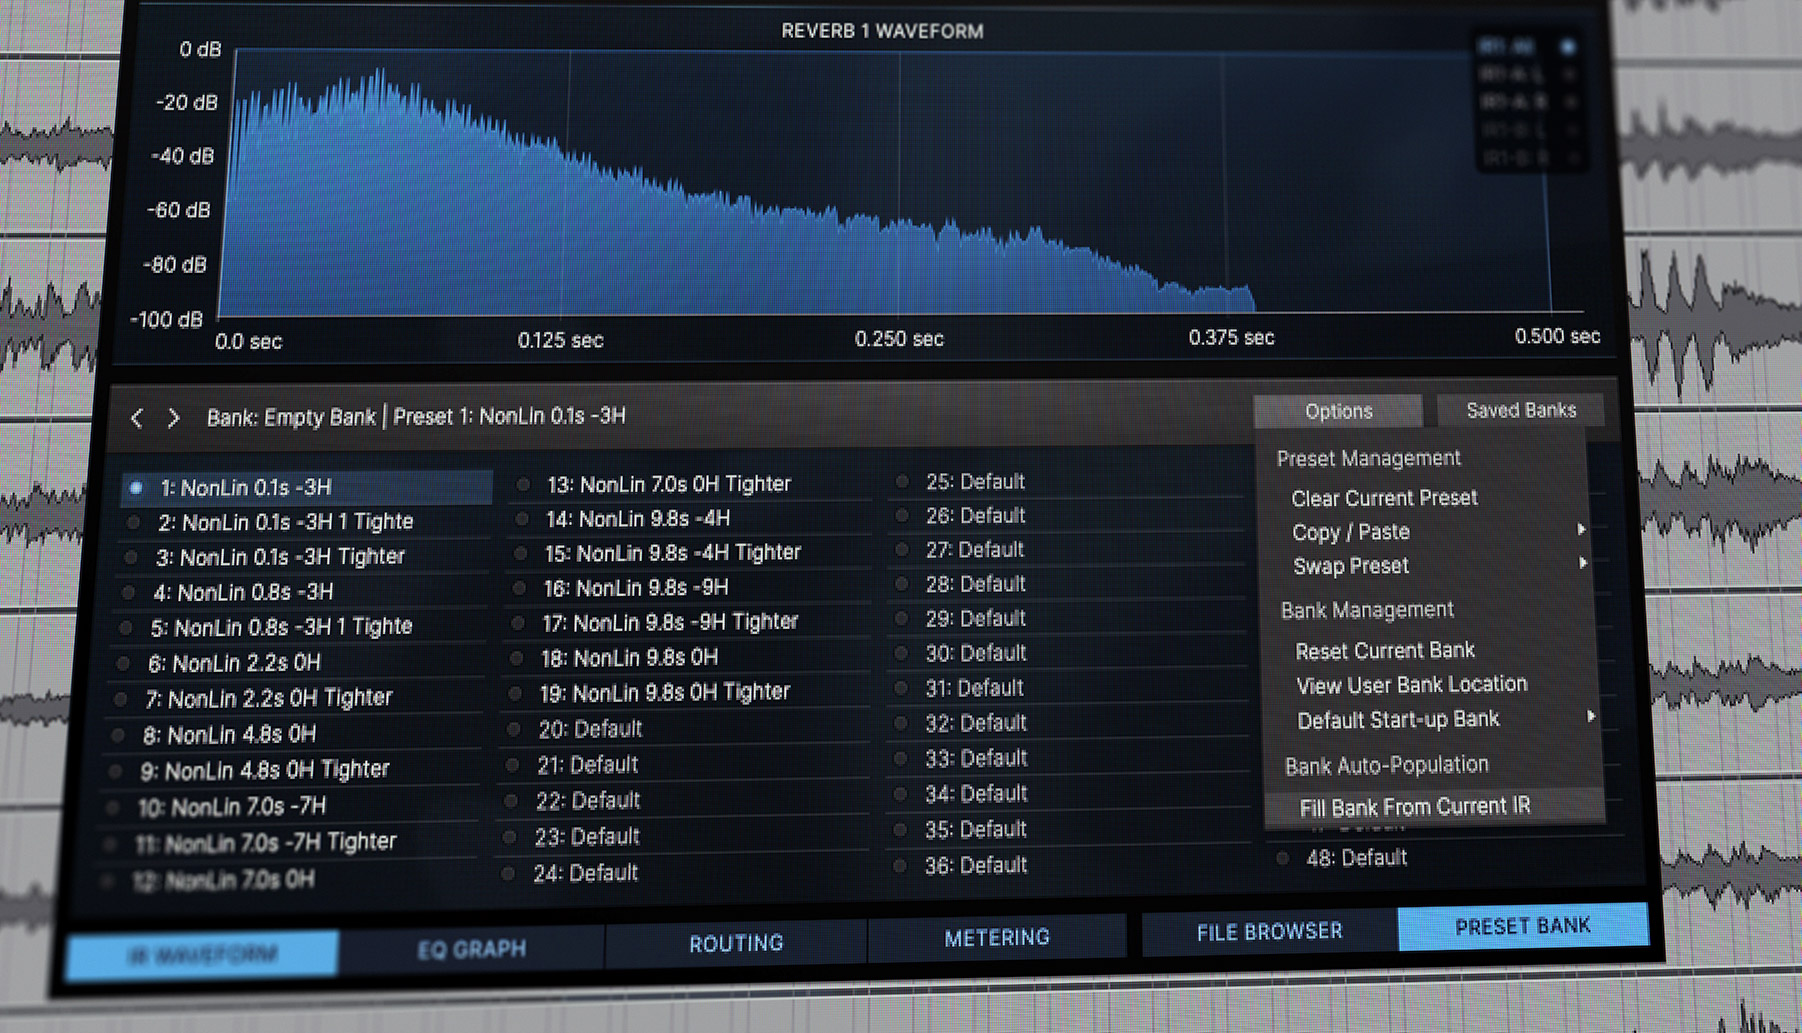
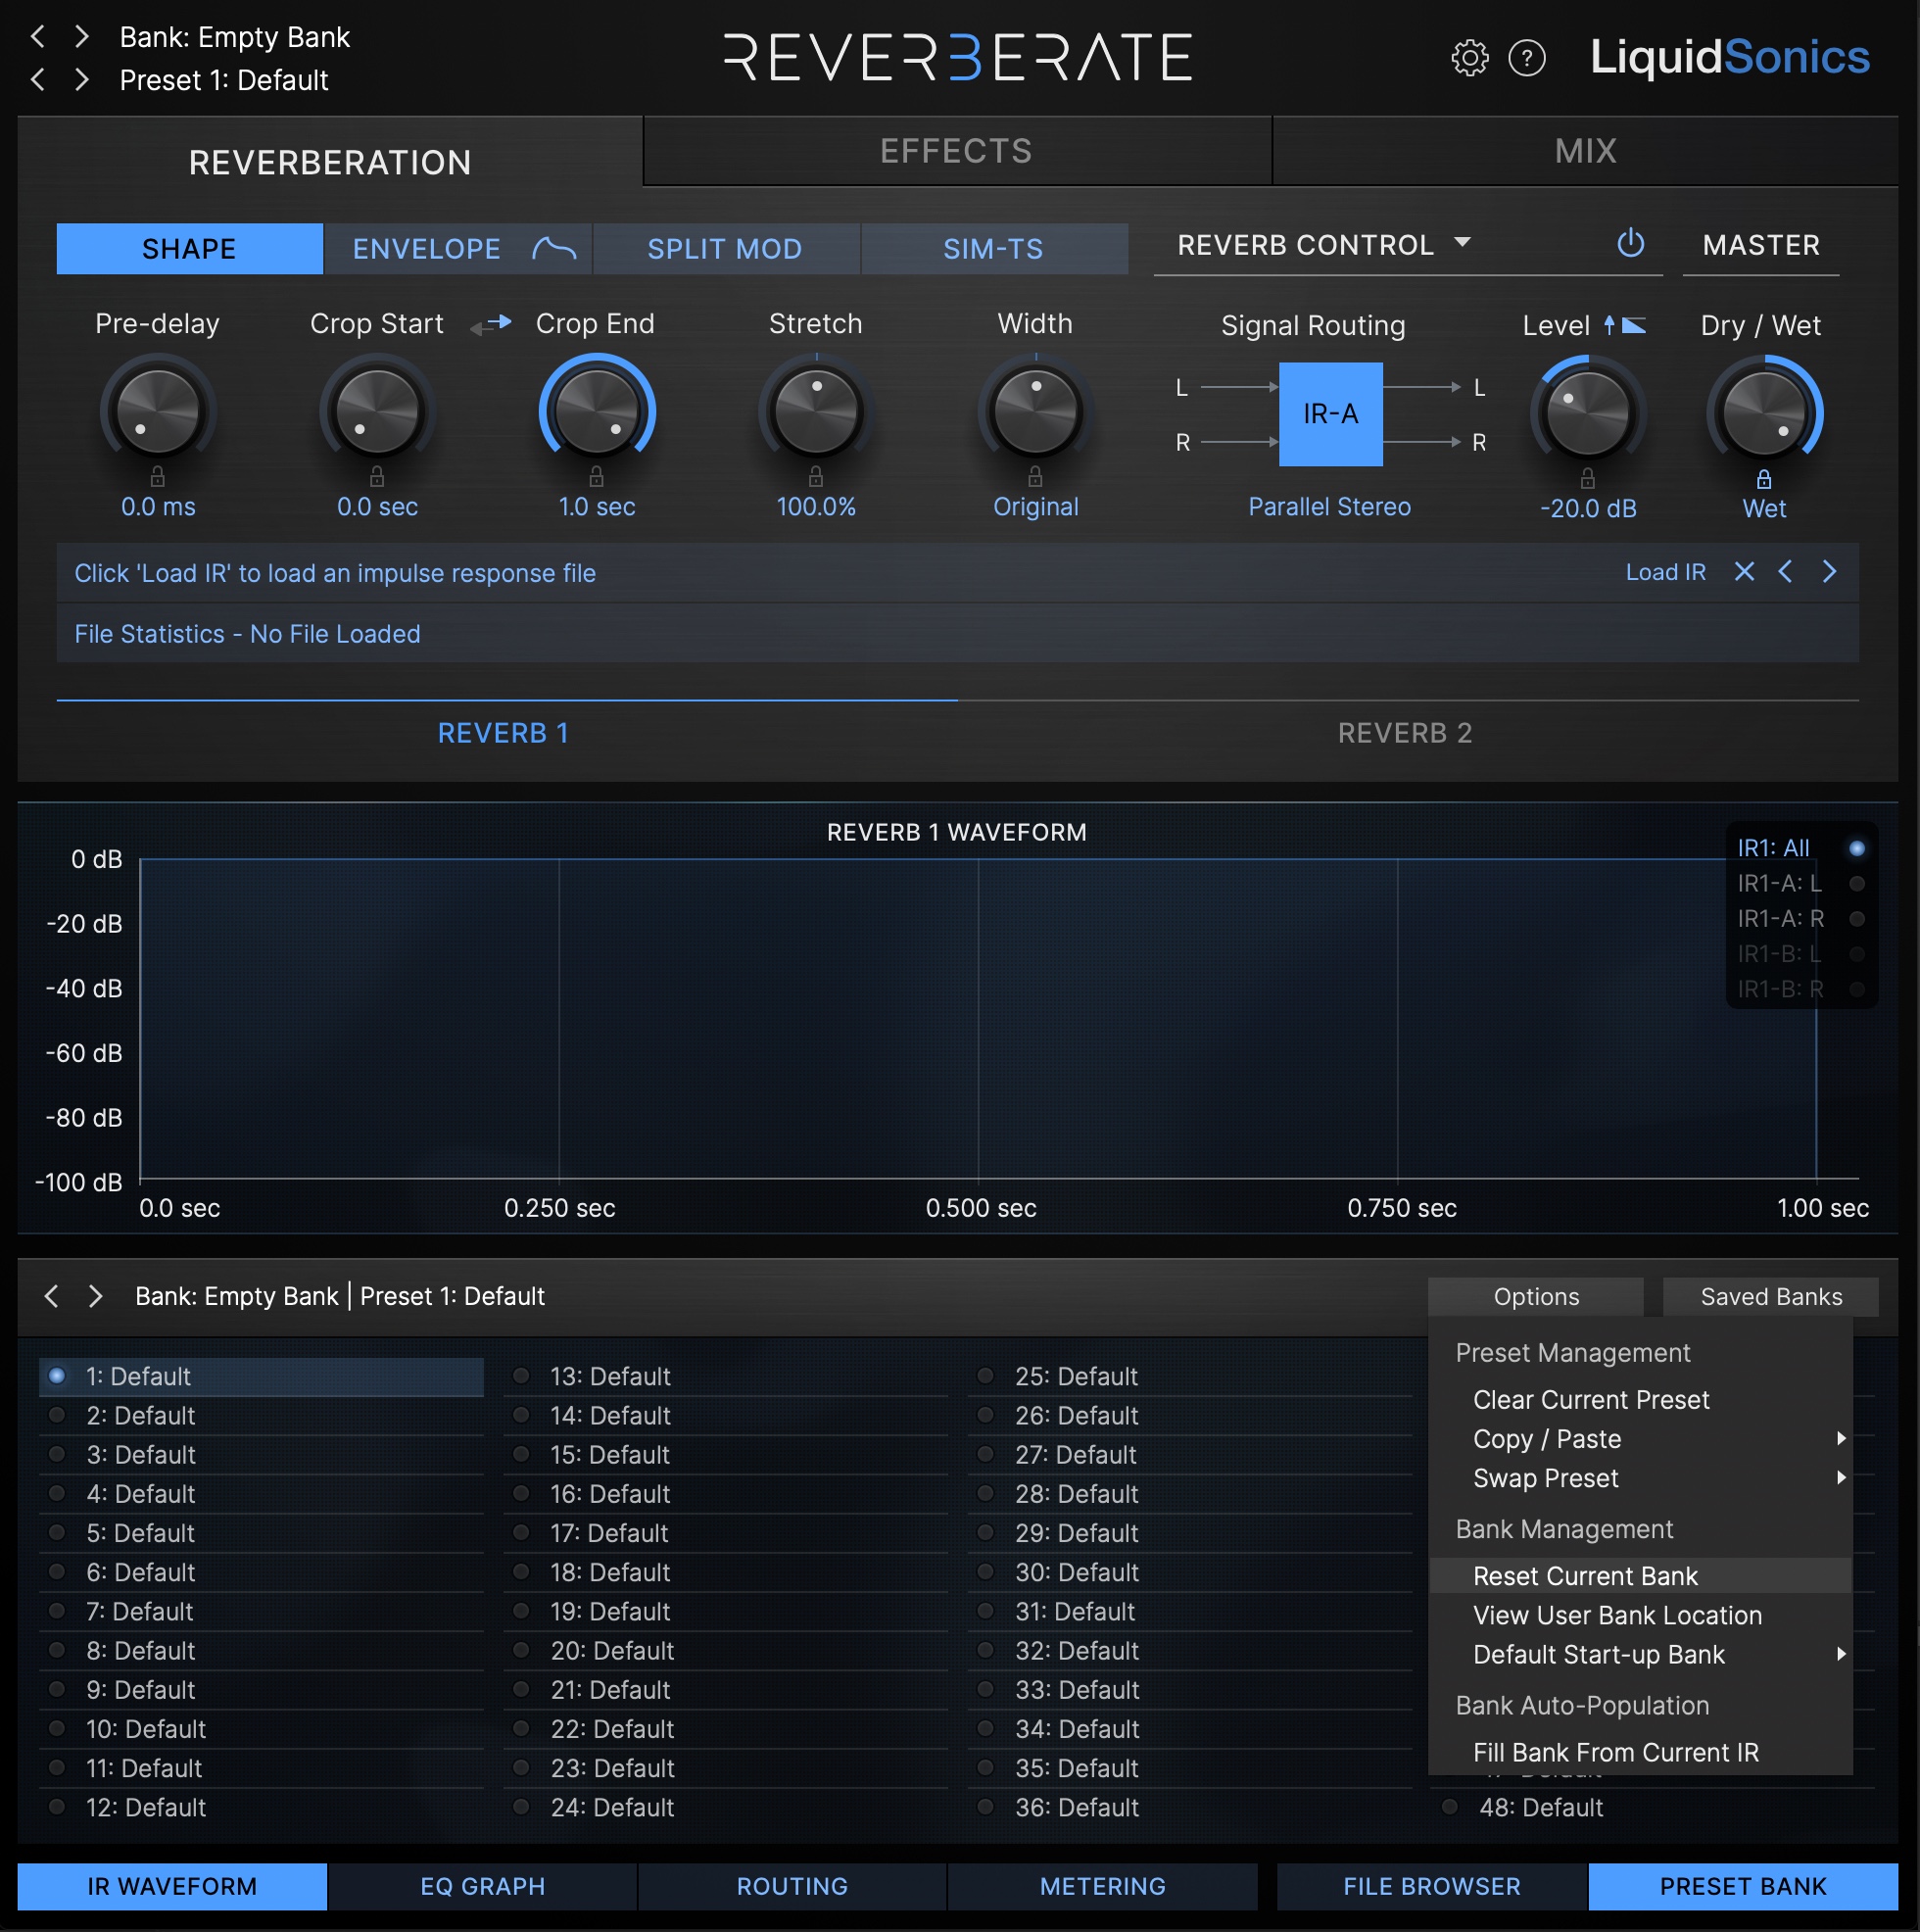
2. Select the first preset in the bank you are in, optionally clearing the bank by clicking “Options” and then “Reset Current Bank”.
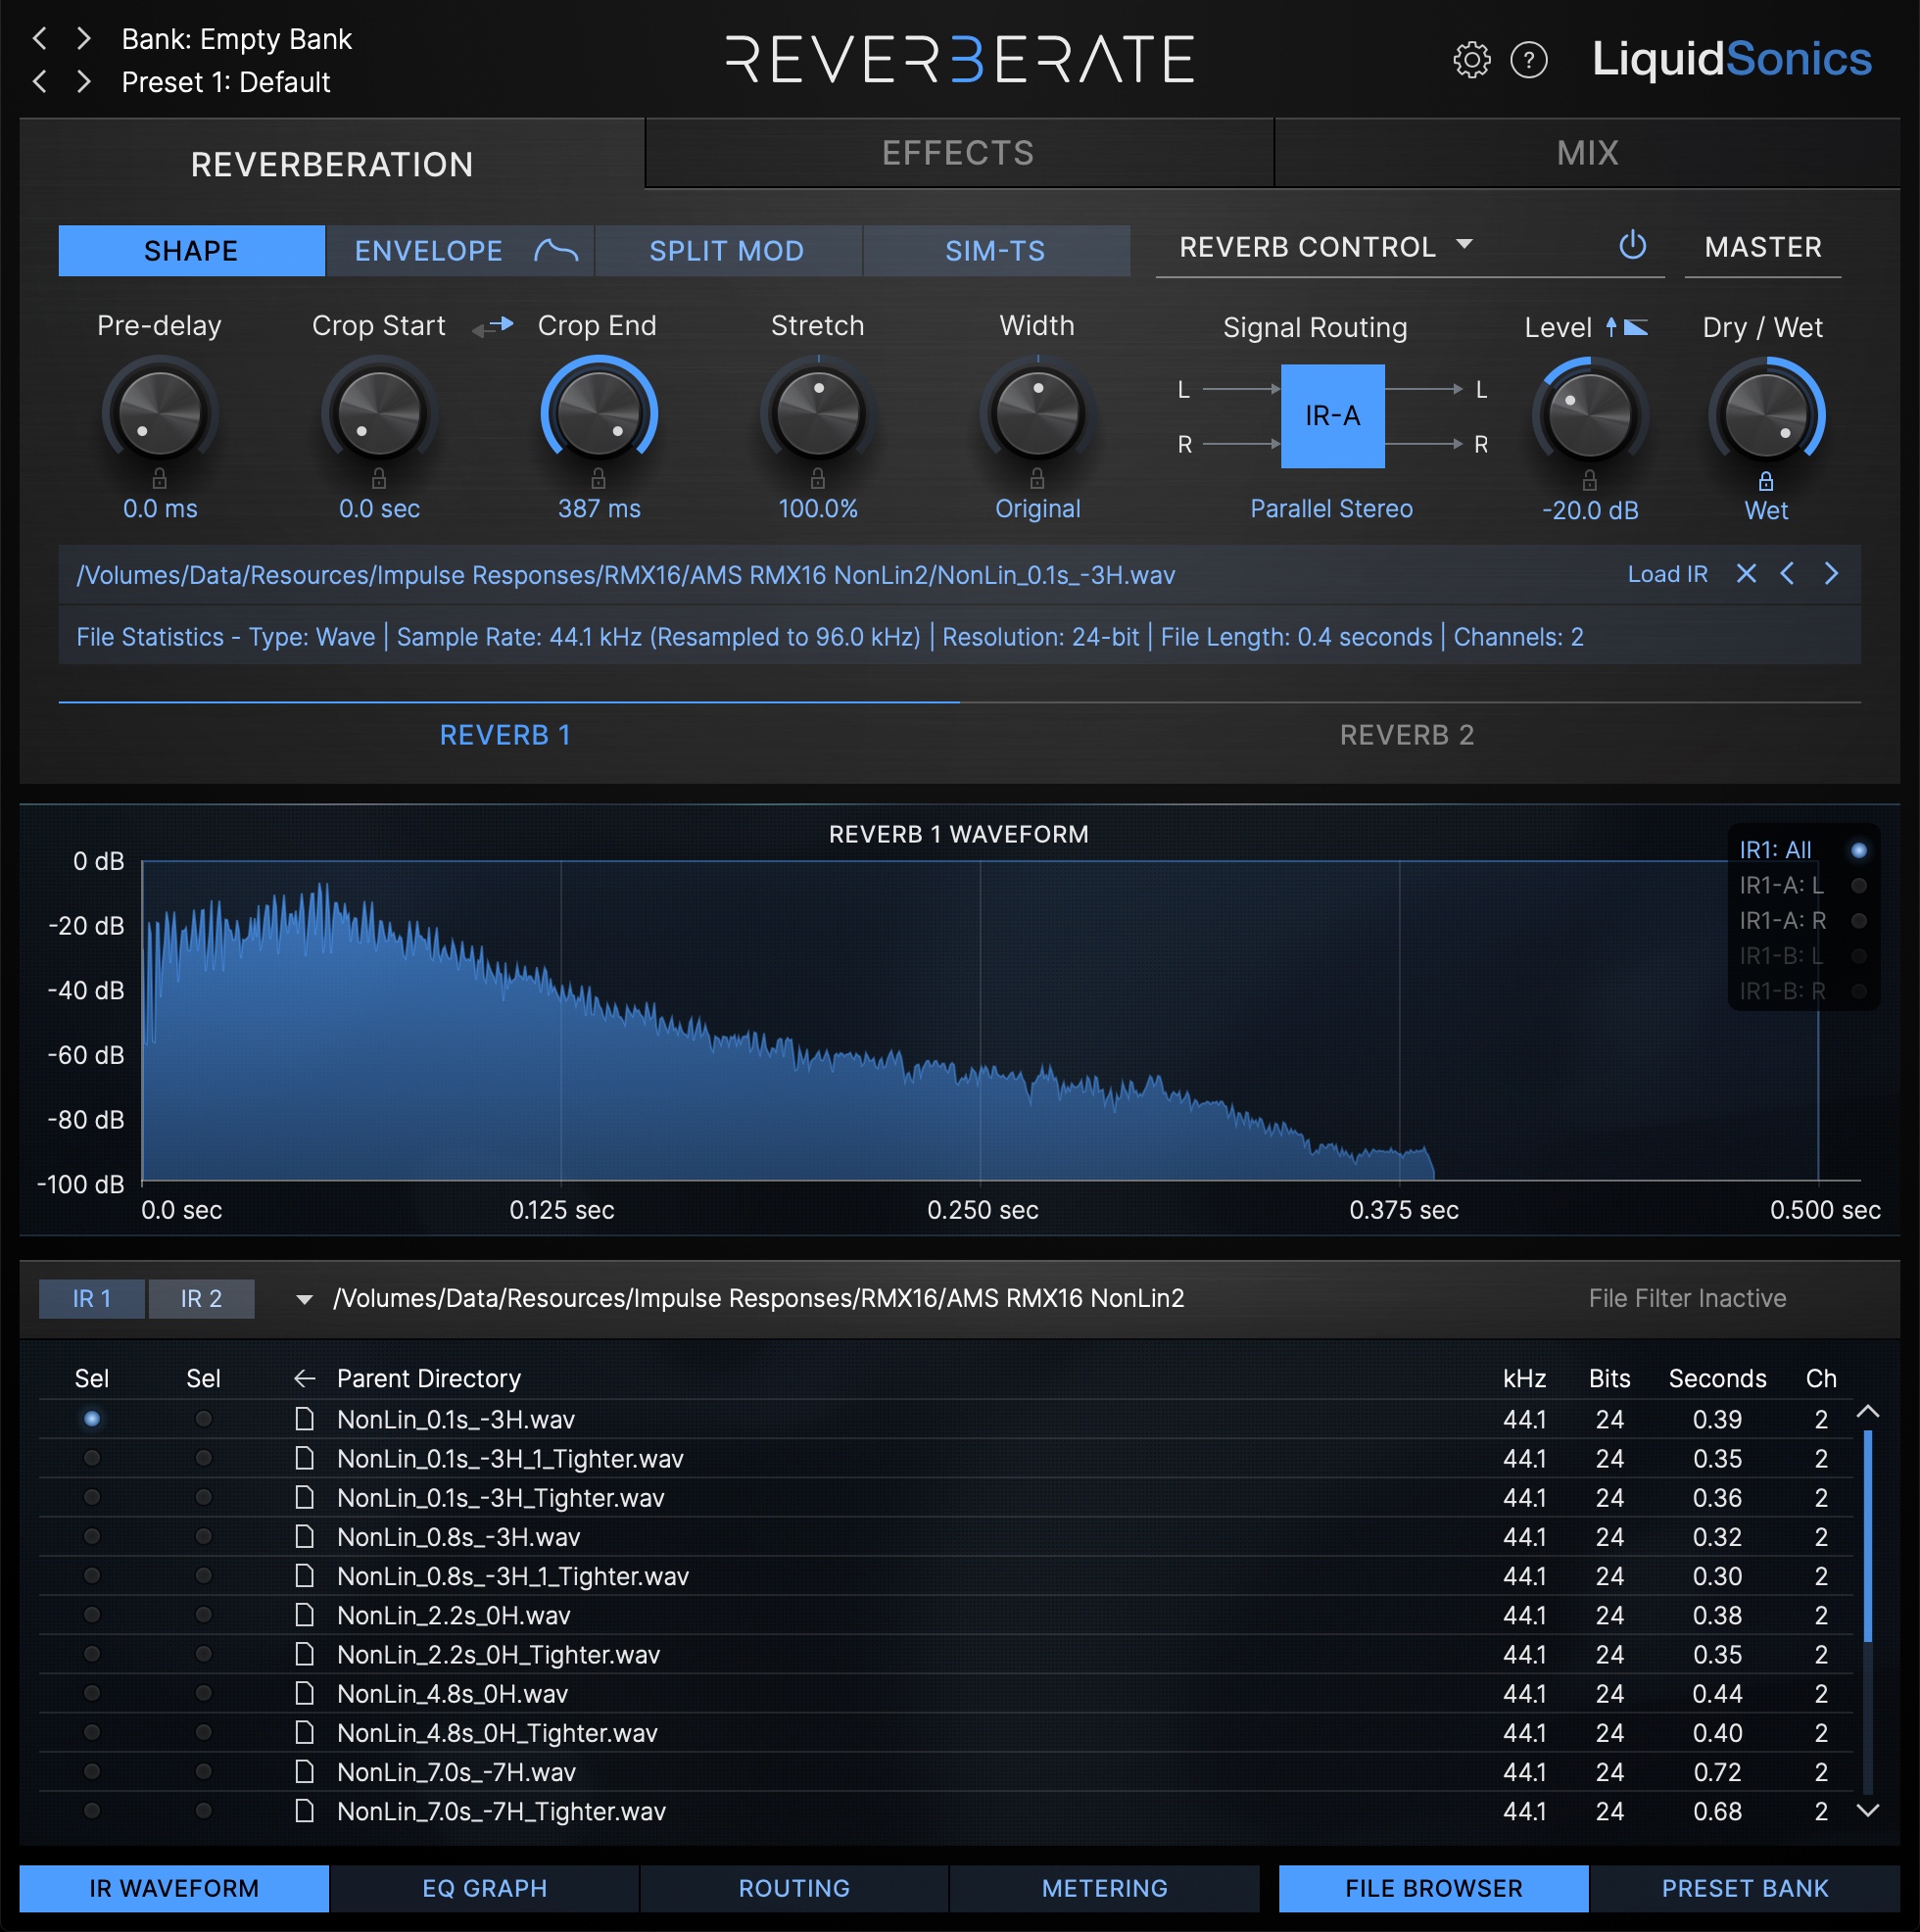
3. We need to select an impulse response to begin automatic population as the starting point. Ensure you have the Reverb 1 container visible.
We can do the next step in one of two ways:
4a. Using the “File Browser” tab in Reverberate, navigate to the folder you would like to populate presets from and click the first impulse response in the list.
or
4b. Click Load-IR in the centre right section of the plug-in. Select the first impulse response in a folder of content that you would like to populate a bank for.
Note: 4a is the preferable method as some operating systems do not sort in the same way as Reverberate sorts (i.e. some may use a numerical sort rather than an alpha-numeric sort as Reverberate uses, so you could end up selecting an IR that is not going to be seen as the first by Reverberate and occasionally miss an IR or two if that is the case)
5. Select “Options” then “Fill Bank From Current IR”. This will rename the first preset according to the selected impulse response, and then work through the rest of the folder creating presets for the bank using the basic default preset as a template and inserting the next impulse response it finds until all files are examined. It should also automatically set up the correct topology for the file found and pair-off any true stereo files if auto-pair mode is active (which is the default). If there are not enough IRs for the whole bank, the remainder of the bank will be set to a default empty preset.
6. You should see as many new presets filled in the bank as there are impulse responses in the folder (unless some were paired off as left/right pairs). The plug-in will automatically turn underscores into spaces. Preset names are limited to 24 characters, so some might be truncated. Check the bank contains the presets you expected.
7. If you wish you can add more presets to this bank from another folder. For instance suppose there were only 10 IRs in the folder and you have a bank with 10 presets. With space for 38 more you might like to fill it up with IRs from another folder. Perhaps Rooms and Chambers are similar enough that it makes sense to use a single bank for those if there are space for them both in a single bank. Select the first unused preset (i.e. preset 11 in this example), then go back to step 4.
8. You may like to check the levels of your IRs. It is helpful to normalise your bank to a similar level as the factory presets. It is worth going through them all and setting the Reverb 1 level control to account for any variability. I tend to normalise with a good LUFS meter and a simple broadband noise source (such as pink or white noise).
9. You can now save this bank from the “Saved Banks” menu as a user bank, and it will appear in the banks selection menus in the top left corner of the plug-in.
Worked Example
Let’s use the Inhalt RMX pack as an example (check out an earlier blog post about this particular library if you’d like to know more about how to get the most from it).
You can hover your house over the hot-areas of the image (indicated by a plus in a circle) for guidance.
First we clear the bank and ensure we are in Reverb 1.
Next we navigate to the folder containing IRs we want to populate, and select the first.
Next we will populate the bank from the new Options menu item “Fill Bank From Current IR”. After this has run the bank contains 19 presets set to the impulse responses in the Inhalt “AMS RMX16 NonLin2” folder.
Finally save the bank for later use.