
The AMS RMX16
The AMS RMX16 is a reverb that does not require verbose introductions. It’s a classic.
Like its peers, it quickly became associated with many famous recordings throughout the 1980s. Hardware devices are still selling for high prices on the second hand market which serves as a testament to the quality of the original design. Recently it has been reborn in hardware form via new digital emulation in a 500 series unit from AMS, and is also available as a recreation from UAD. They are all excellent reverbs containing many great algorithms, but it is perhaps best known for having a fantastic nonlinear (‘nonlin’) algorithm.
Just like the original, the recreations are mono input / stereo output processors. That means a stereo source is summed to mono before it enters the device – not ideal if you would like to retain panning or if you have a stereo recording that loses a lot of its character when summed to mono before being fed into a reverberator.
So although I really enjoy using RMX16 reverbs, it is devices like these that really inspired me to create technologies that could take them further. I know many of you have some great collections of impulse responses and in this blog post I want to take you through a short case study using some third party commercial samples of the RMX16 to demonstrate how Reverberate 3 can elevate these old classics to something even more special than you might remember.
Impulse Responses
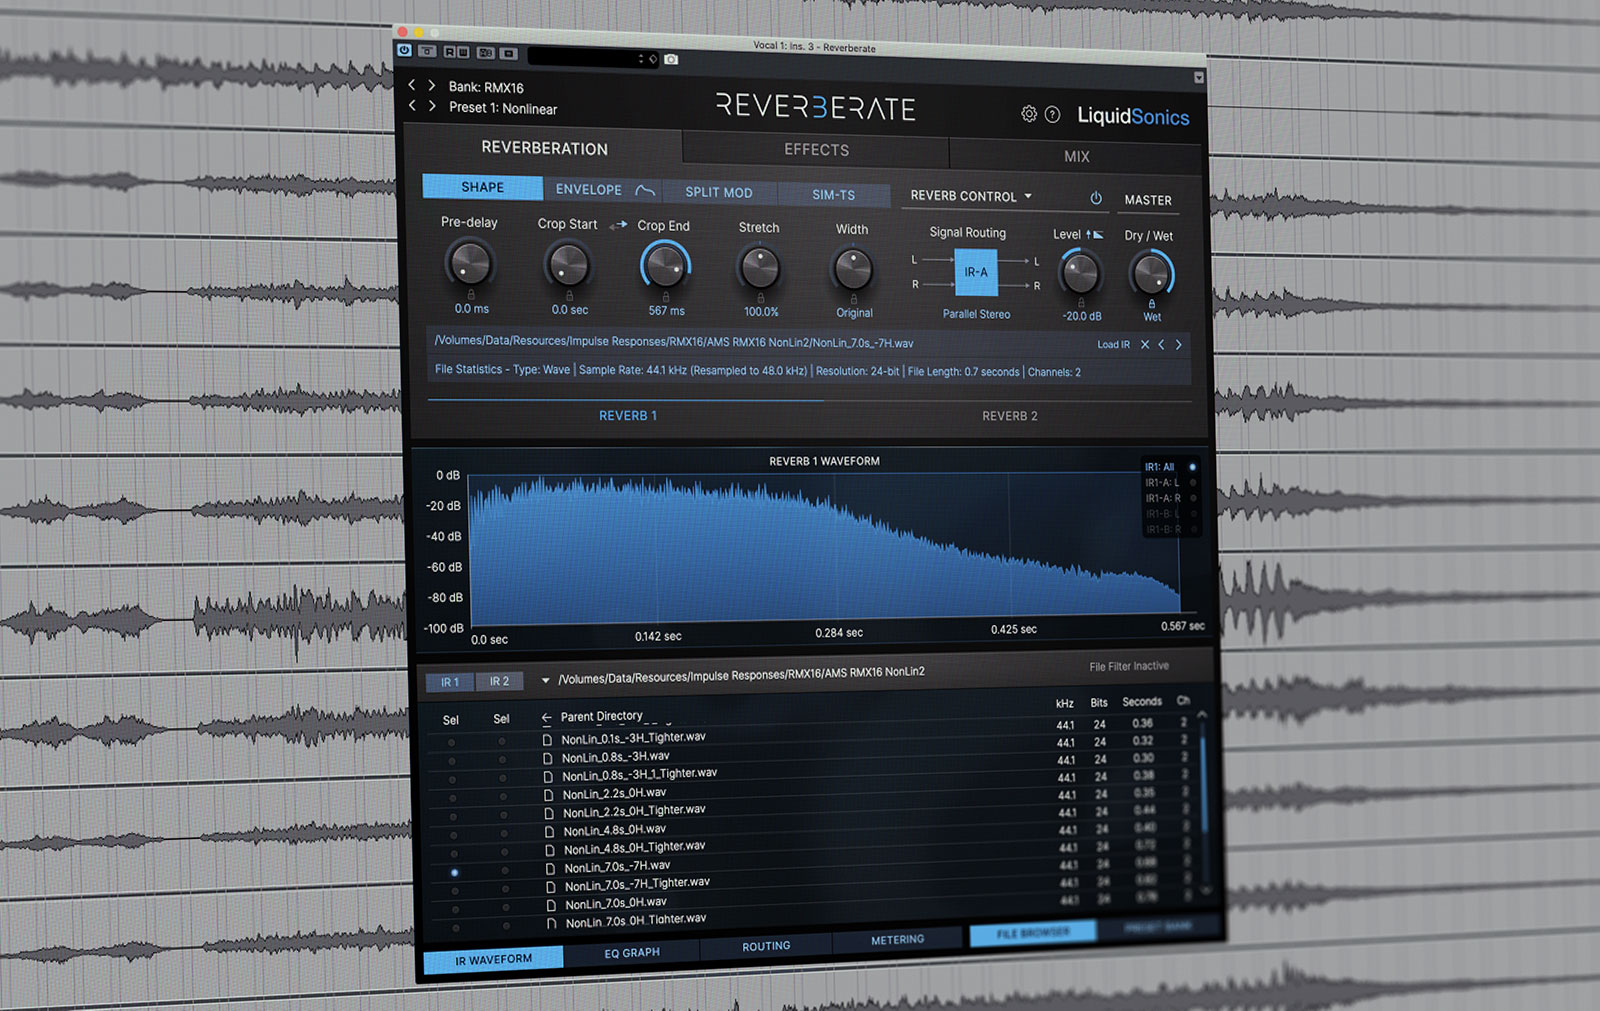
The RMX16 is a static reverb with no independent control over its reflections. That means it does not benefit from a Fusion-IR capture procedure, so I have not ever taken the time to sample the unit myself. Like many classic reverbs however, there are some fantastic RMX16 impulse responses available online. You may already have some in your collection, but if not, one that I personally recommend is the Townhouse RMX16 pack from Inhalt and I am using this in the example below.
Step 1 – Simulated True Stereo
A true stereo reverb feeds a proportion of the left signal into the right channel, and vice versa – there are four channels of reverberation here. A mono to stereo reverb such as the RMX16 sums a stereo input to mono and creates a stereo output – there are two channels of reverberation in this case. Clearly the former is a more complex process and tends to sound richer.
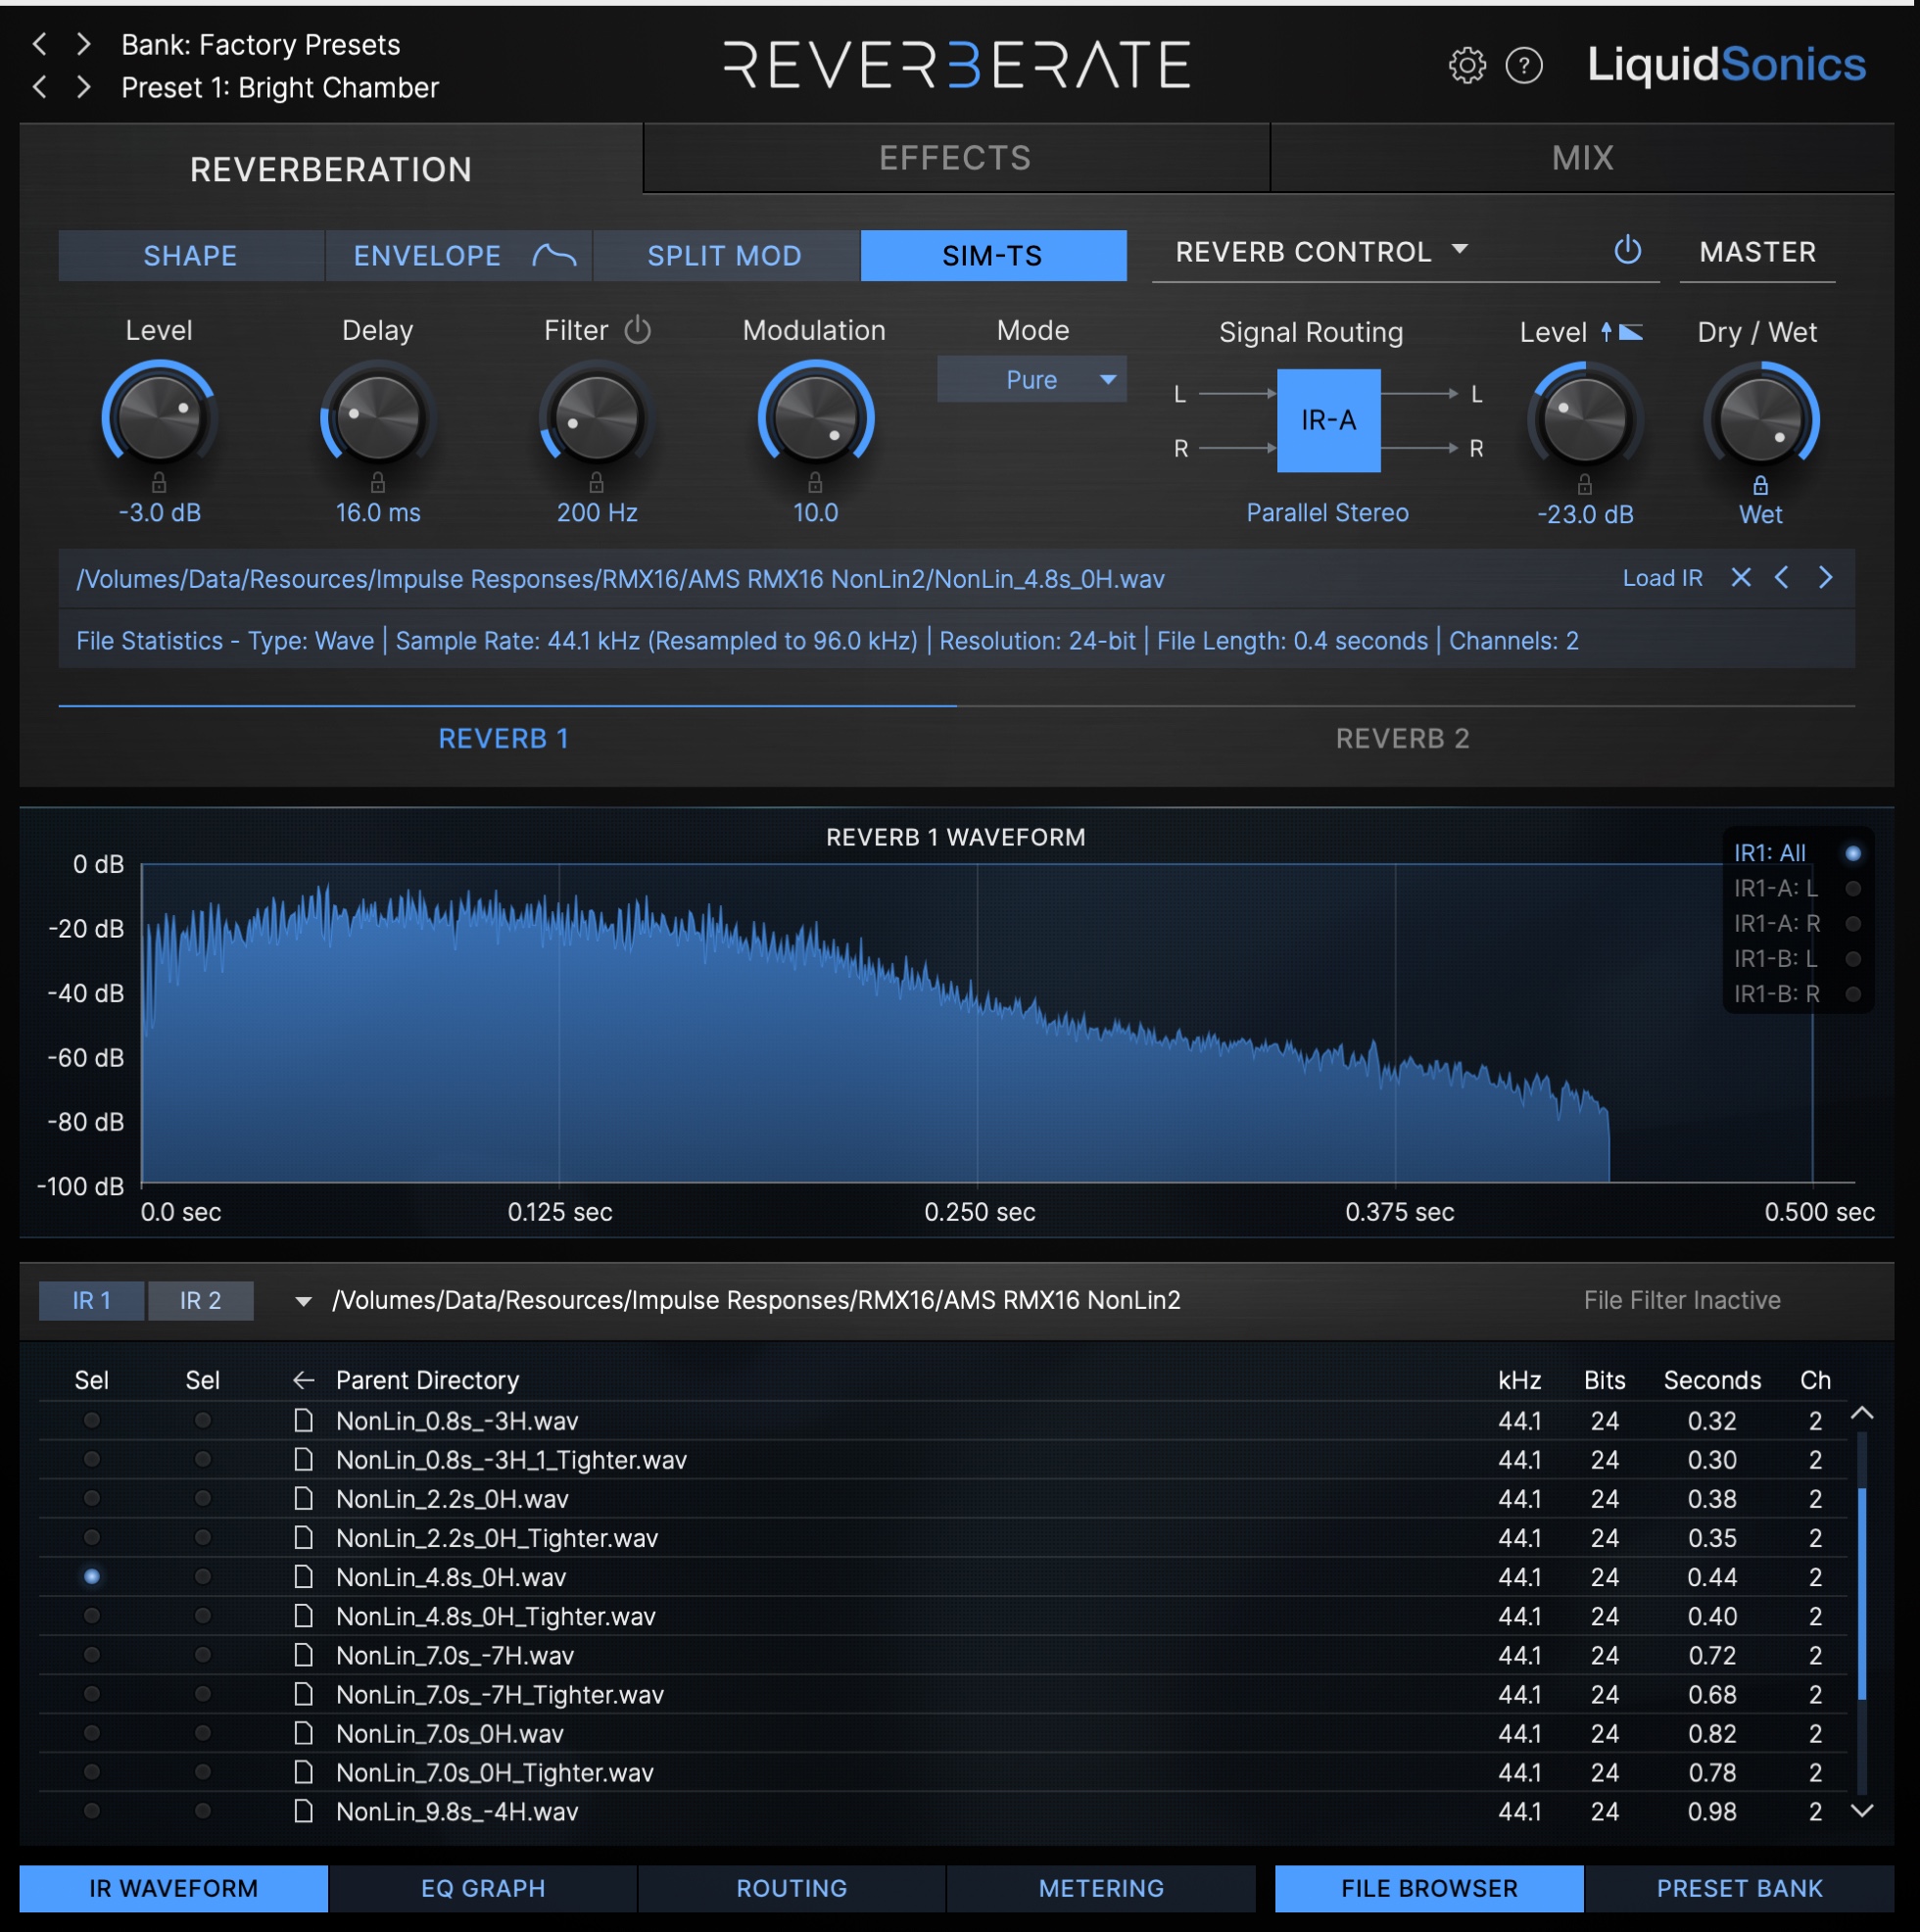
In Reverberate 3 we can simulate this effect by using the Simulated True Stereo facility. For the example below we have selected a nonlinear reverb sample (the 4.8s sample denotes the position of the decay time dial on the device, but it is not actually a 4.8 seconds long reverb in nonlin mode). We open it in parallel stereo mode so that the input remains stereo, and then from here move to the SIM-TS tab and enable the pure mode to turn it into a simulated true stereo reverb.
I have chosen quite a long crossfeed delay of 16ms (often 10ms will suffice) and because of this did not find it necessary to use the filter on this occasion.
The level is set to -3 dB, which just means the crossfeeds (left to right, and right to left) are going to be lower than the direct signal level by 3 dB. This will allow a very natural sense of propagation around the space whilst still allowing a degree of pan tracking to persist.
Finally the modulation has been set to maximum, this means the crossfed signals will be offering up a very dynamic component to compliment the direct signal.
If you play a stereo recording of a piano or guitar through this true stereo reverb you should immediate hear the difference. Swap between the ‘pure’ and ‘disabled’ modes and you can tell the sound is much richer and reaches tightly around the stereo sources so much better now.
The delay on the crossfeed helps spatialisation enormously, and will have a tendency to increase the density of the reverb just a little as well which can reduce some of the flutter that can sometimes be heard on this unit. You could go even further by engaging the ‘dense’ mode, although that can reduce clarity so use this mode with caution.
Step 2 – Split Modulation
Although the crossfeed modulation sounds great and you could stop there, we can go much further and really liven this sample up.
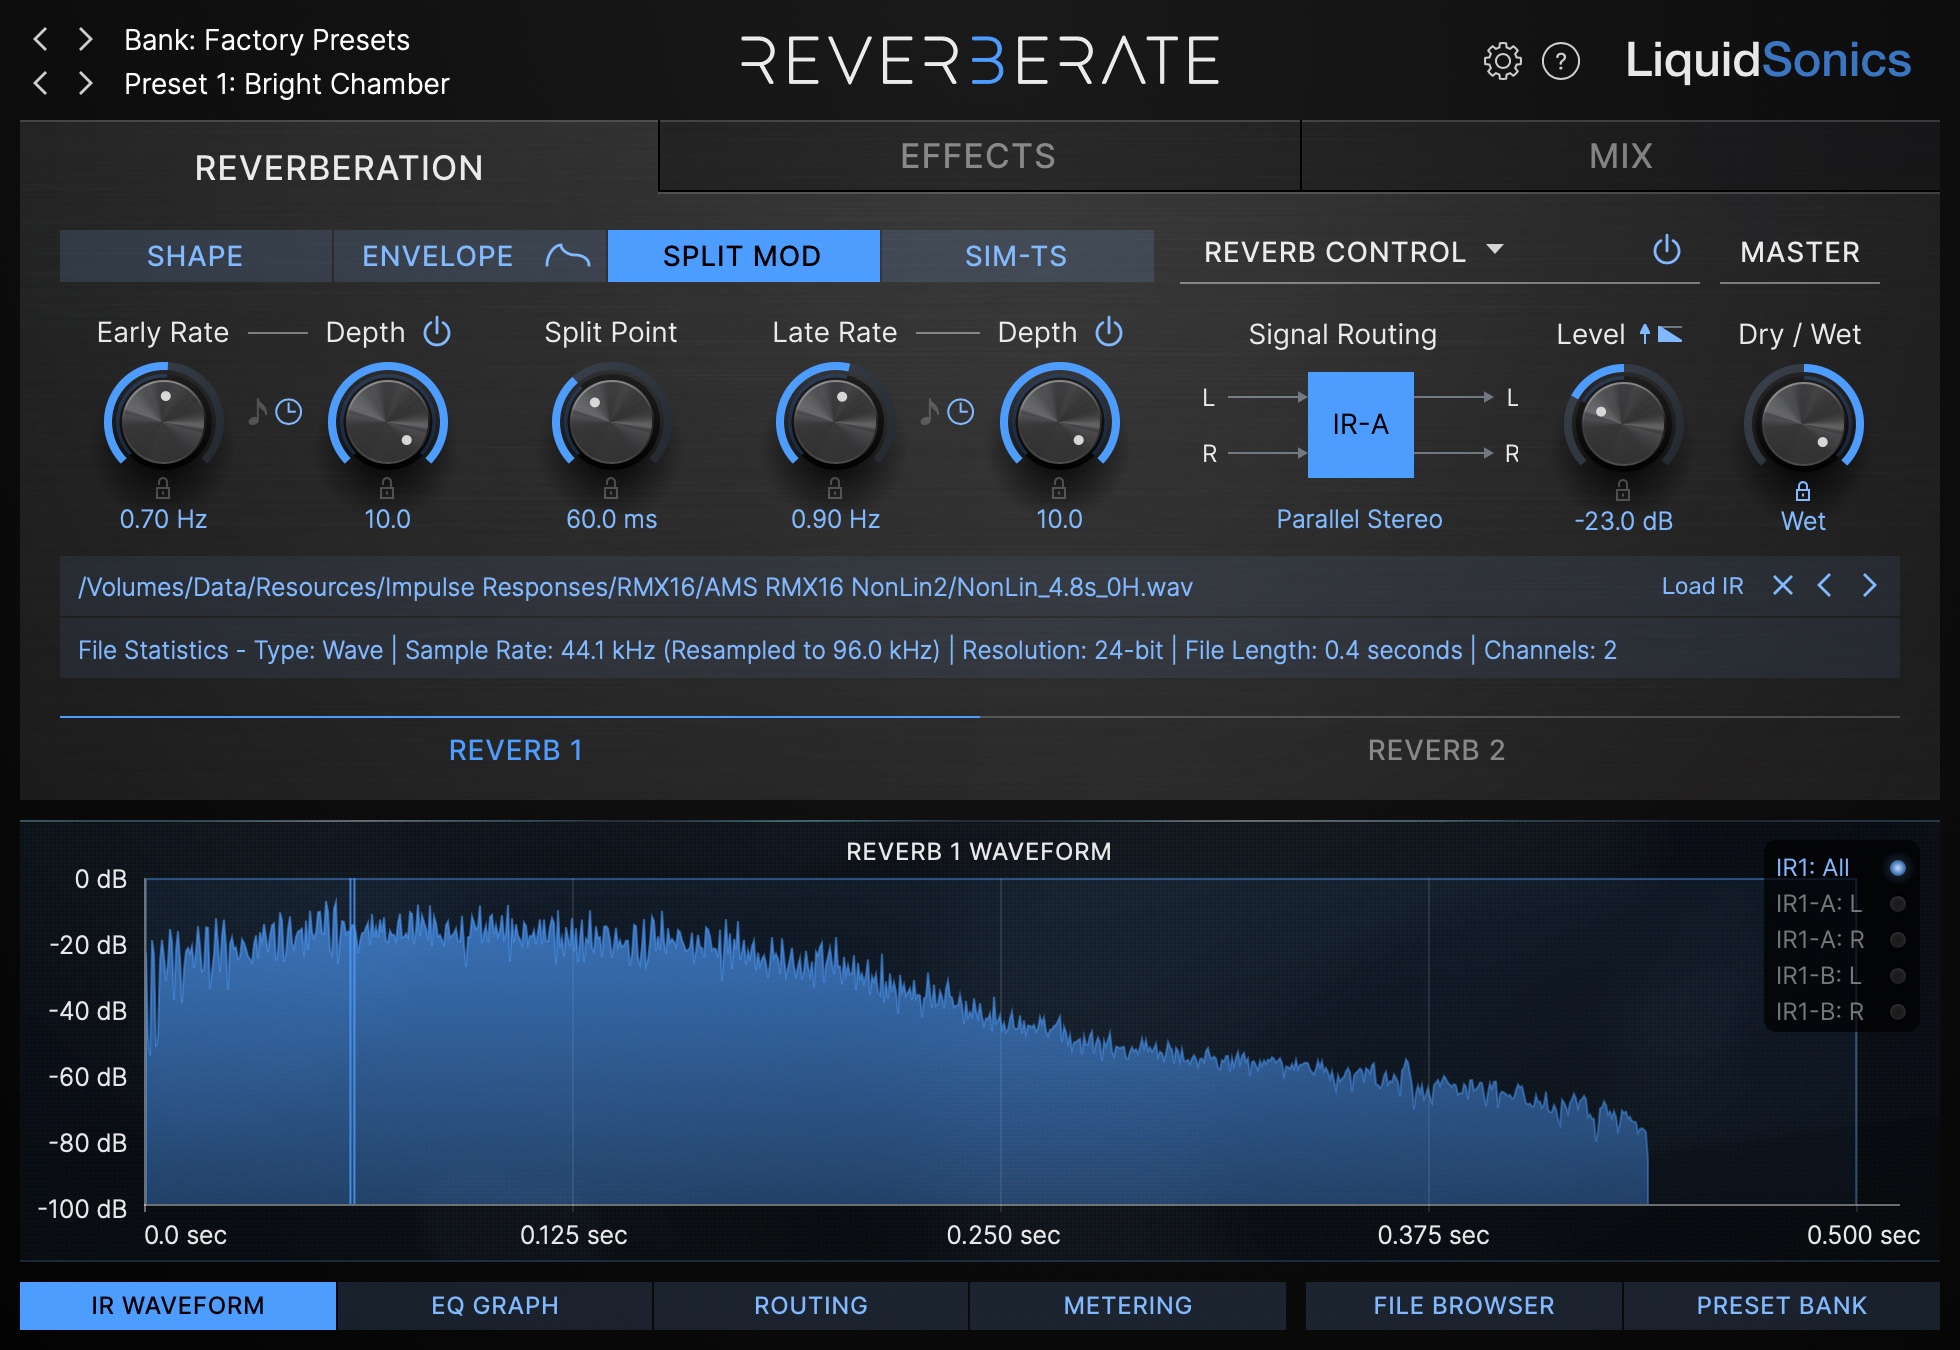
Head to the ‘Split Mod’ tab and split it at 60 ms. You can see before this point the reverb is in a growth / bloom region, then follows around 100 ms of near-constant reverb, followed by a decay region. We split the reverb here so that we can modulate the bloom independently of the remainder of the reverb, but it would be just as good a little way into the sustained period too. Just be sure to set each modulator to a different rate if you want to use both modulators.
I have selected the time based modulation rather than pitch modulation. It is a little more subtle, but a much much safer form of modulation that avoids any pitching problems on vocals or pianos. If you were using drums and wanted the modulation to be more extreme selecting the pitch mode (see the note icon) for the initial section would be a great way to go.
I want the modulation to really impress so I have the depth set to full on both modulators. We now have dual modulators at different rates working on the direct lines, and each dual modulator has the additional modulator from the SIM-TS facility working on the crossfed channels too. That should really liven up the impulse response, but it does so in a way that does not sound at all forced or synthetic.
Step 3: Compare The Results
Now load the same impulse response into the second reverb processor and set the same reverb up in its original mono-stereo mode. You can hover your mouse over the hot regions in the image below for some tips about how to do this quickly.
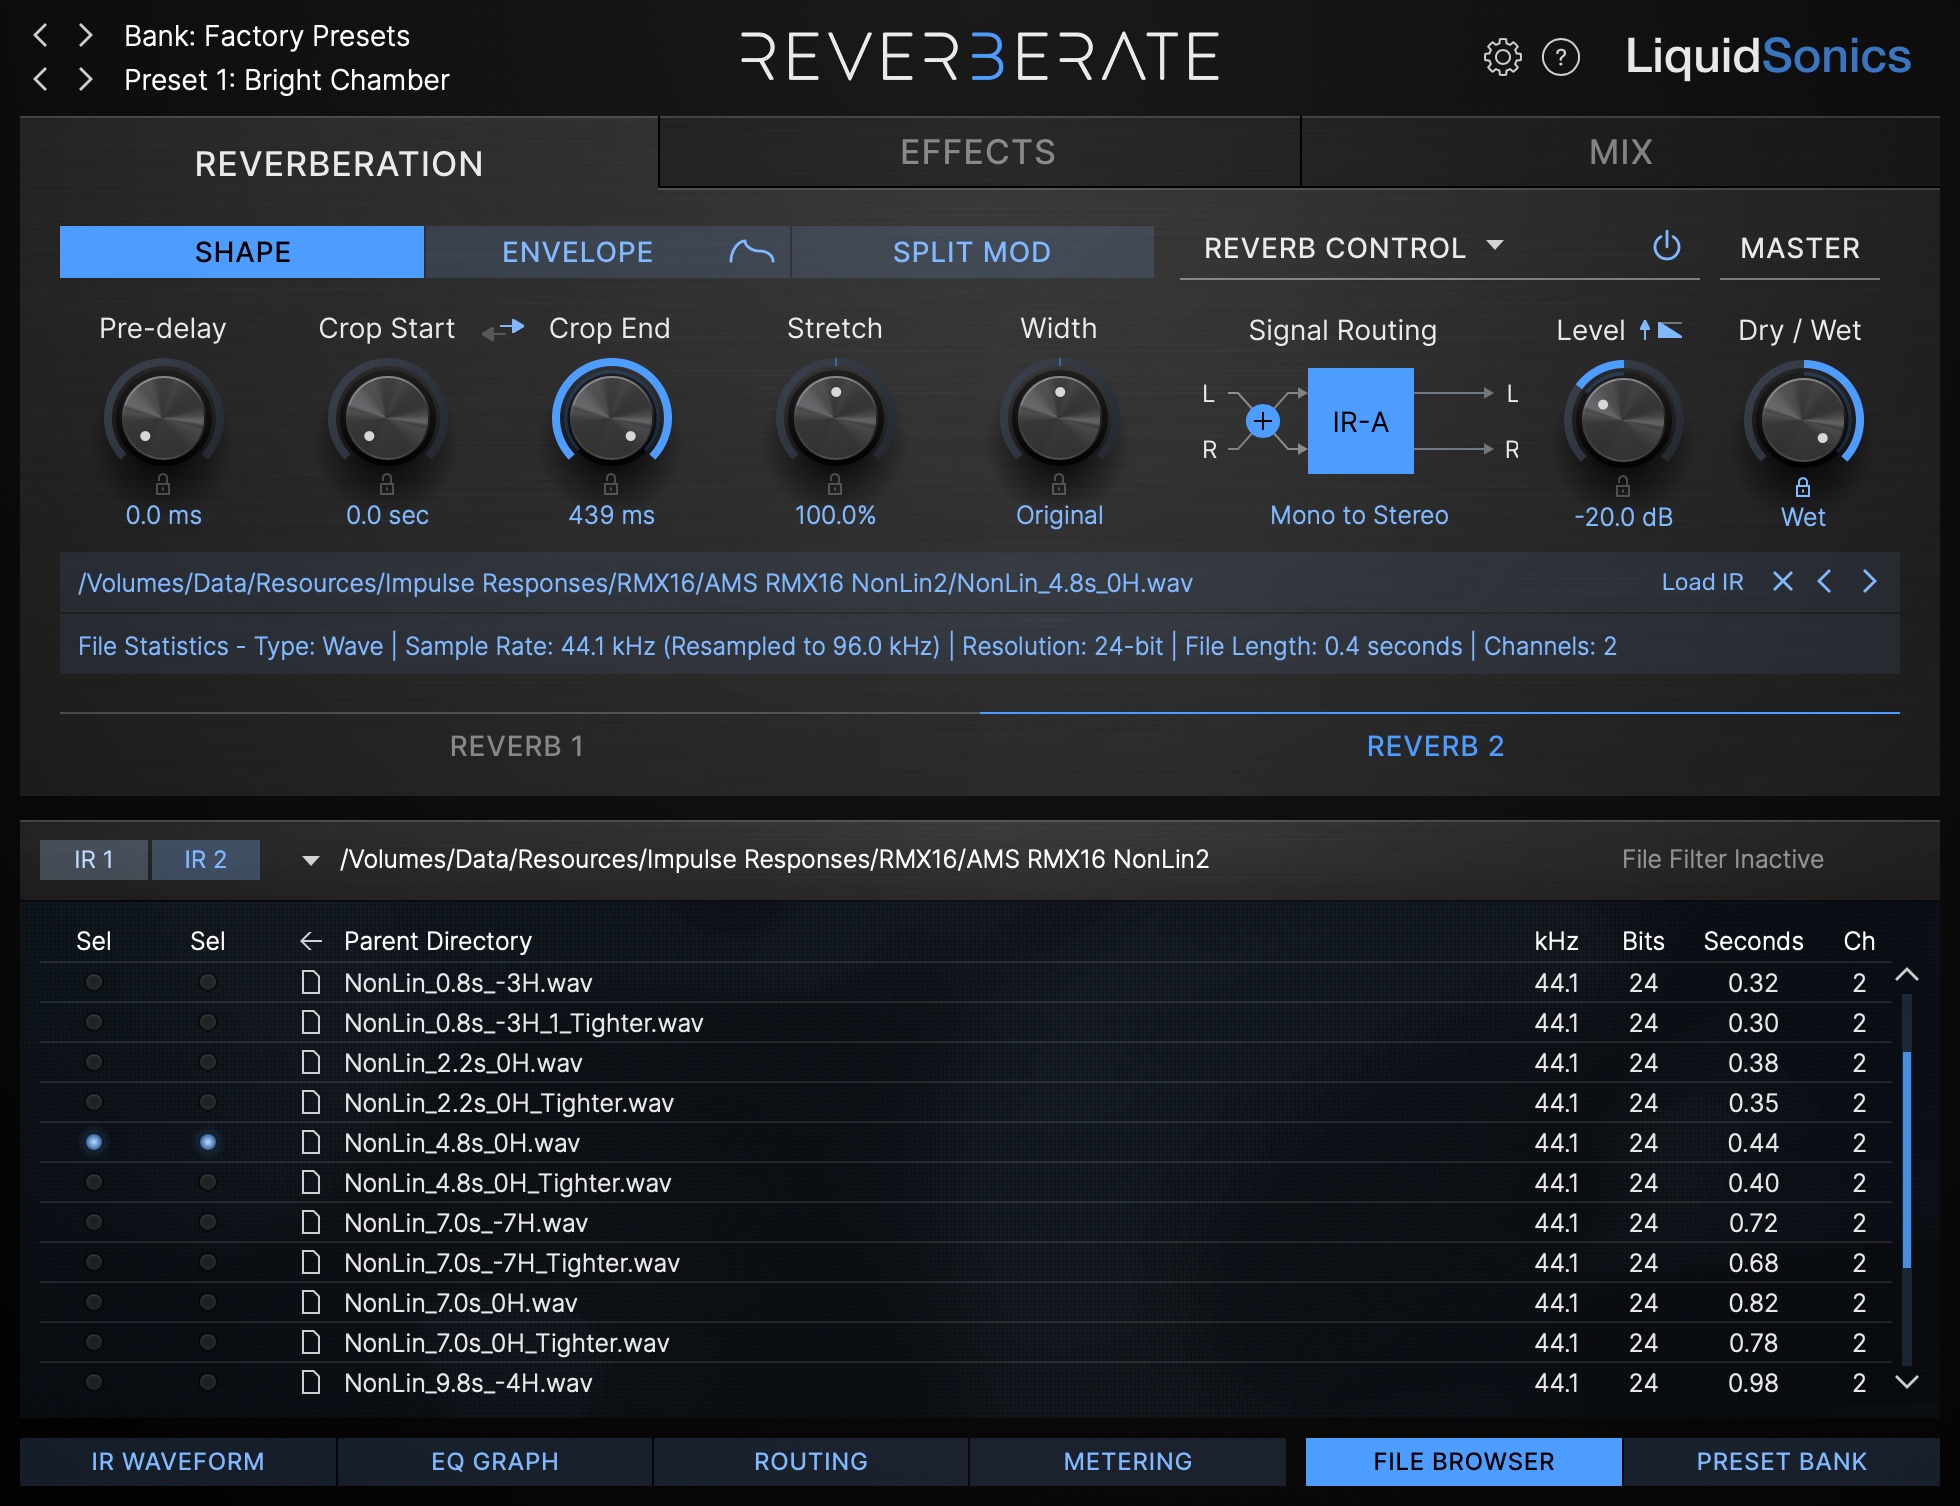
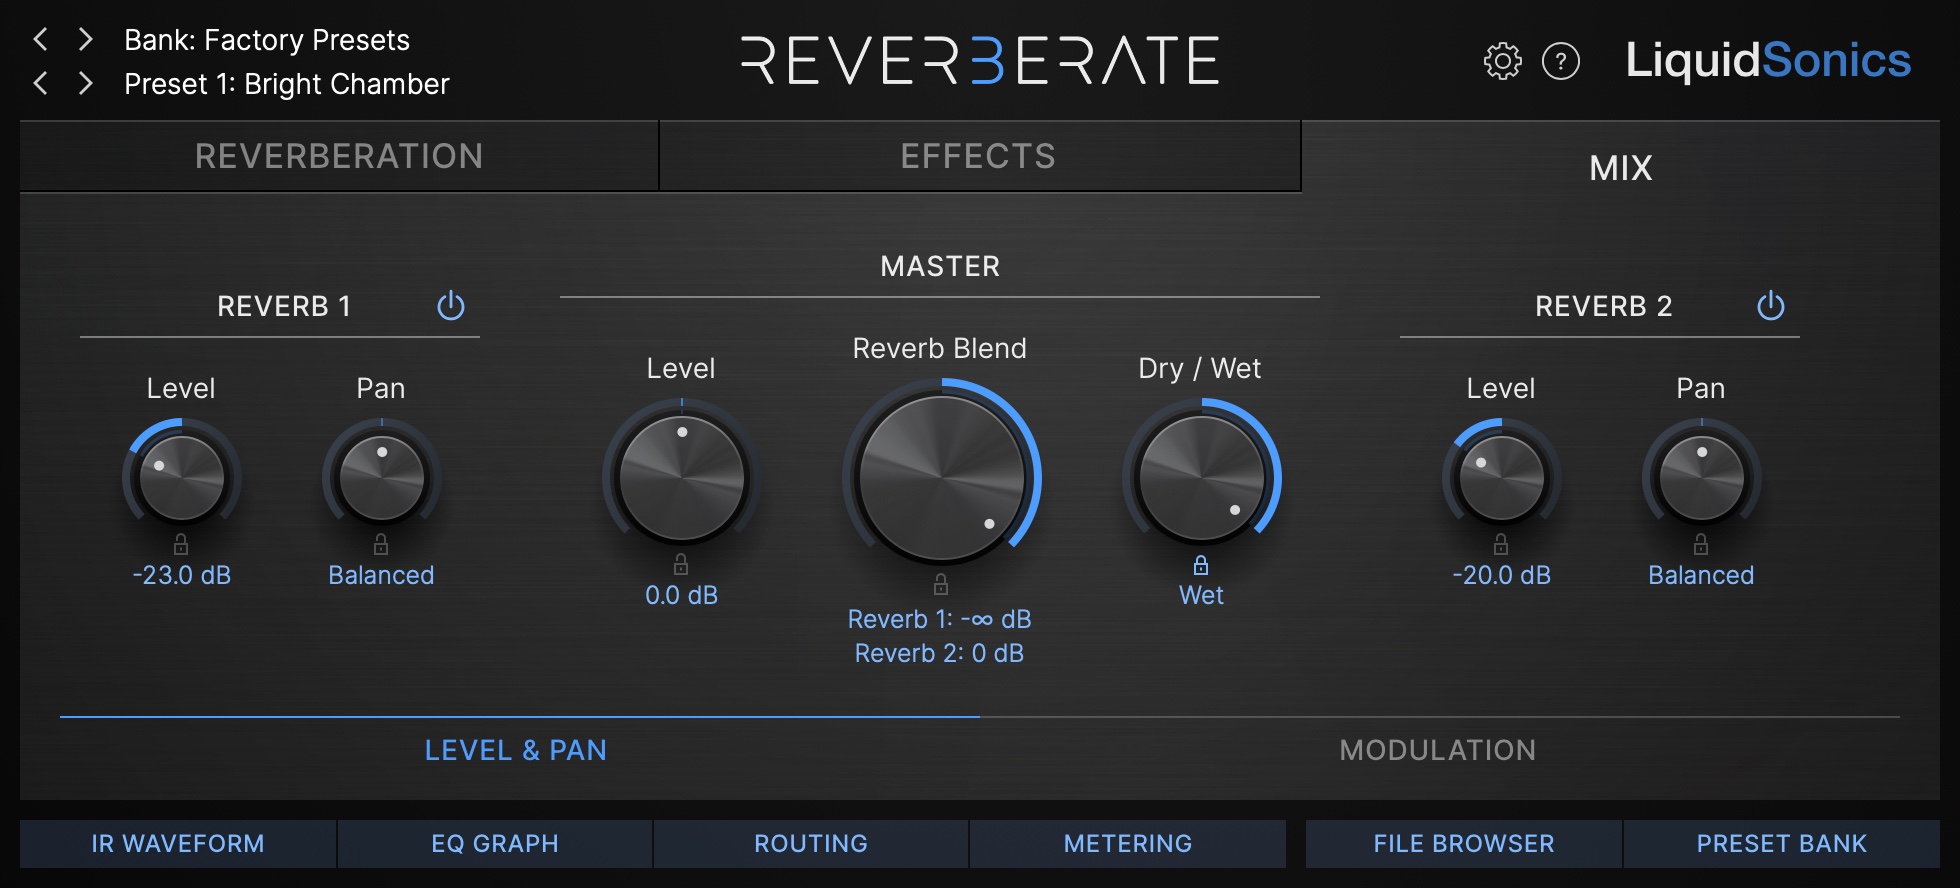
Head to the mixer tab, and for fairness give the Reverb 1 engine a little gain cut. The true stereo simulation facility will boost the level of that engine a little, so when comparing the reverbs it is important to level match as louder content often sounds better when you flick between sources (you may need to tweak this a little extra depending on your source to get it just right, but around 3 dB should do).
Now you can quickly sweep the reverb blend left or right to isolate the reverb engines, making a comparison of the differences between the two quick and easy. In Reverb 1 is your modulated enhanced RMX16, and in Reverb 2 is the original.
You should be able to hear the reverb is now so much more alive. It is richer, a little denser, and just sounds more modern but has not lost any of its original character or charm. This is why we say that in Reverberate 3 legacy never sounded so good!
Try this technique out on any samples from legacy units that you may have, prime candidates are the Lexicon PCM 60 or a classic EMT 140 plate. For me, on sustained note sources like vocals, guitar or orchestral pieces the difference is stark – a richer and more encompassing reverb that breathes more easily. On drums, perhaps a little less as chorusing is a bit harder to hear, but it undeniably helps the reverb blend with the dry more easily in a way we tend to only hear on a modern modulated reverb. For a device which was always known for its excellence on percussion it creates something really quite special!