LiquidSonics reverbs are renowned amongst professionals in the creative industries for their superior surround capabilities. Not just for the captivating quality of the reverberation itself, but also for their flexible workflow capabilities such as the surround propagation modes.
This article sheds some light on these advanced facilities, equipping you with extra techniques to control the reverberant space with surgical precision and creative flair helping you on your journey towards mastering the art of surround music production and score mixing.
Professional Workflow Propagation Requirements
For immersive surround mixes, the ability to differentiate the reverb treatments for different positions including fronts, mids, and rear signals proves highly valuable. Often, contrasting lengths or pre-delays between front and back are preferred, with a lusher or longer decay in the surrounds enhancing the surround space. In the past this was commonly adopted by many engineers using utilising multiple stereo reverbs on dedicated busses for front, rear, and (in 7.1) side channels.
When originally designing Cinematic Rooms, we consulted with Scott Michael Smith about how he uses reverbs in surround mixes. Scott shed some light on the mix process for us with respect to how existing multi-stereo workflows needed to be translated more fully into the surround reverb space.
He explained that the use of multiple stereo reverbs in surround productions not only offers him a level of control often absent in dedicated surround reverb plugins, there are also inherent differences in the way sound transits the space in a stereo vs a surround reverb. This is because surround reverbs, regardless of panning or bussing, inherently send back a full surround reverb (reflections and late tail) to all discrete channels. While impressive and appropriate for certain applications like solos or mono sources, it can become cumbersome or overwhelming when dealing with orchestral or rhythmic elements, where specific mic placements call for a more tailored spatial treatment.
He gave the example of an orchestral setup with four ambient/surround mics. An engineer may wish to have these mics routed to their own dedicated reverb, with the resulting tails solely impacting the surround or elevated channels. The ability to pan and control reverb returns individually within a surround mix is invaluable and we may need to prevent any sound or reverb from the rear mics from reaching the front channels which is difficult with a traditional surround reverb. Of course this is the effect when using when using stereo reverbs, but it can lead to poor decorrelation across stereo channel sets requiring the reverbs to be adjusted as a means of bringing them out of correlation; this can be time consuming to manage especially when auditioning and adjusting presets across the set. We discussed with Scott about ways to bring the best of both worlds together in Cinematic Rooms.
Users of some DAWs are familiar with using non-surround plugins in a “multi mono” mode. Most LiquidSonics surround reverbs can be used with an internally configured “multi true-stereo” propagation modes available. This means they provide the ability to control which stereo channel planes the processed tails are returning through, enabling independent routing (and in some cases editing) of each reverb plane within the plugin.
In practical terms, consider a 7.0 surround mix using Cinematic Rooms. With a multi-stereo propagation mode, you could send a panned back-left mic to the rear processing plane of the reverb, with the processed signal returning exclusively to the back left and right channels with appropriate cross-feed properties in the right side. Meanwhile, the front channel is isolated from this and handles its own independent reverb sends and processing. This approach can provide the isolation between channels that some mix situations require and can save the number of required reverbs for a standard surround mix too, all whilst ensuring a cohesive space and a well decorrelated set of reverb channels as we would expect from surround reverbs.
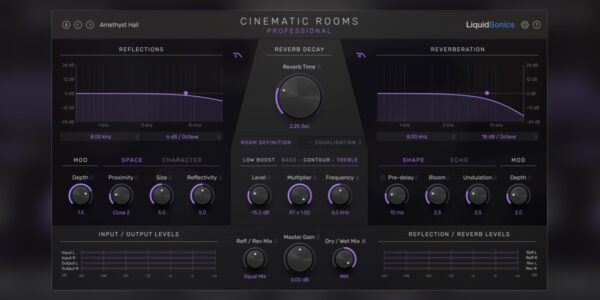
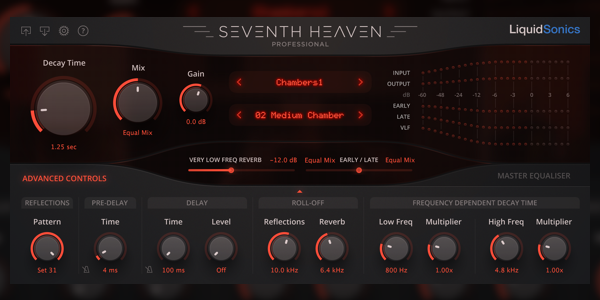
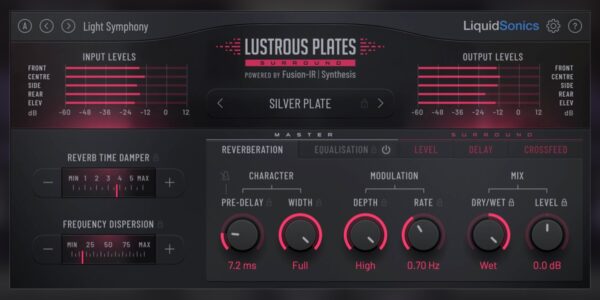
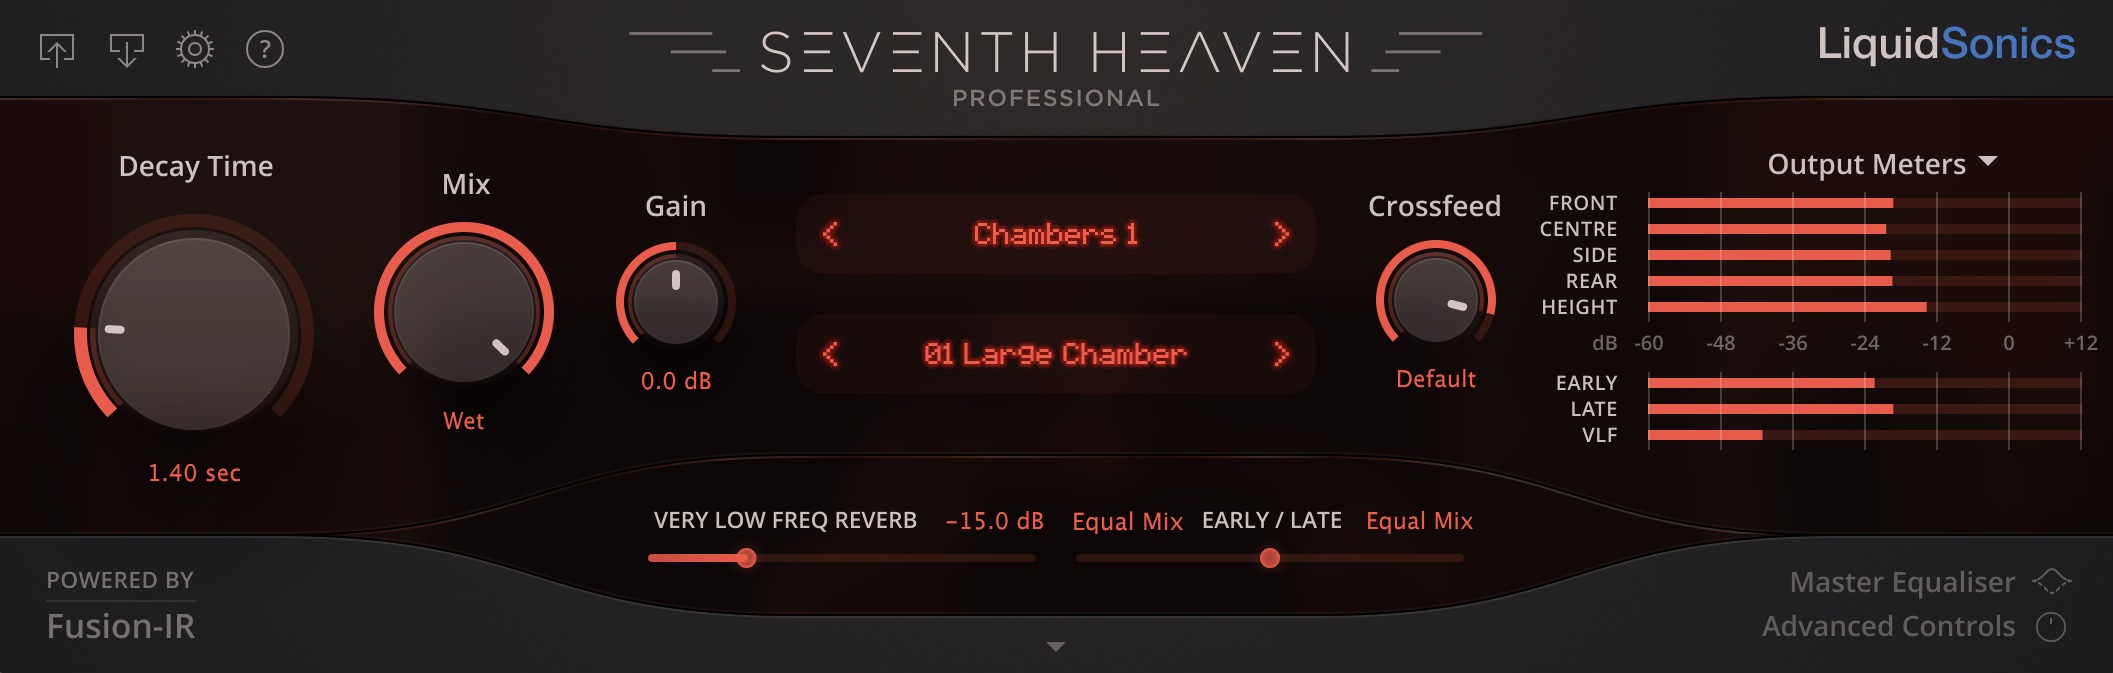
Following our discussions with Scott, we built these multi-stereo capabilities into the reverb. The front, side, rear and elevated stereo planes all behave as independent reverbs when appropriate settings are chosen, but can still be managed as one. Since then even more propagation modes have been built into our surround reverbs including Seventh Heaven Professional, Cinematic Rooms Professional, Tai Chi and Lustrous Plates Surround.
Modes & Capabilities
Workflow discussions with Martin Wrang, a post-professional working with production sound, front of house mixing and podcast editing, led to us adding the ability to treat the front channels as an LCR (left, centre, right) reverb rather than as a traditional stereo pair with an isolated mono centre channel (as is the case in the true stereo propagation mode) known as “Stereo Surround Planes + LCR”.
“One of the things I really like about Cinematic Rooms Professional in my workflow, is that I can set up any configuration I like inside the plugin itself while keeping it on a 5.0 track. I can set it up as multi-mono, front to back stereo pairs, or a full surround reverb without changing track/bus/plugin widths in Pro Tools. I often like to use stereo reverbs pairs for the front and rear channels of a 5.1 setup to add width and space to sounds, while keeping the front to back separation intact.
The new ‘true-stereo with LCR propagation’ mode includes the centre channel in the front LR reverb. This allows me to add the same sense of space to centre channel sounds as to LR sounds, and it lets me pan freely across the LCR while having the reverb respond in a predictable and natural way. If the reverb clutters up the centre channel to much, I can simply turn down the reverb for that channel, or mute it entirely, using the surround plane editing.”
Following conversations with John Michael Caldwell about his specific workflow needs, we also added the capability to prevent the reverb from washing between the left and right channels. This mode known as “All Except L/R Propagation”, allows reverb to transit forward to back (and vice versa), and between elevations channels, but keeps the reverb to the side of the room into which it is panned.
Furthermore, discussions with Bret Killoran led to the introduction of three propagation clustering modes. Bret’s post production workflow requires pan-tracking capabilities that maintain spatial coherence as a source moves through the sound field, ensuring that reverb energy and crossfeed levels adapt naturally to distance and direction. The introduction of Natural, Strong, and Localise clustering modes provides the flexibility needed to achieve this, allowing reverb propagation to behave in a physically consistent and perceptually stable way across complex immersive mixes.
Surround Propagation Modes
The available propagation modes are:
- Full surround propagation – sound entering one channel will cause decorrelated reverberation to propagate into in all other channels
- Stereo-stereo plane isolation – left/right propagation for all planes, but no front/back or elevation propagation (all channels remain fully decorrelated)
- Stereo-stereo plane isolation with LCR – as above, but with the front plane treated as LCR rather than stereo left/right + mono centre
- All except L/R propagation – propagation throughout the space except between the left/right/centre (i.e. nothing along the x axis)
- Clustered propagation – the crossfeed level depends on the distance from the pan ingress channel (three modes can be selected; natural, strong and localise)
- Mono channel isolation – no propagation between any channels, every channel is in effect a de-correlated mono reverb in multi-mono mode
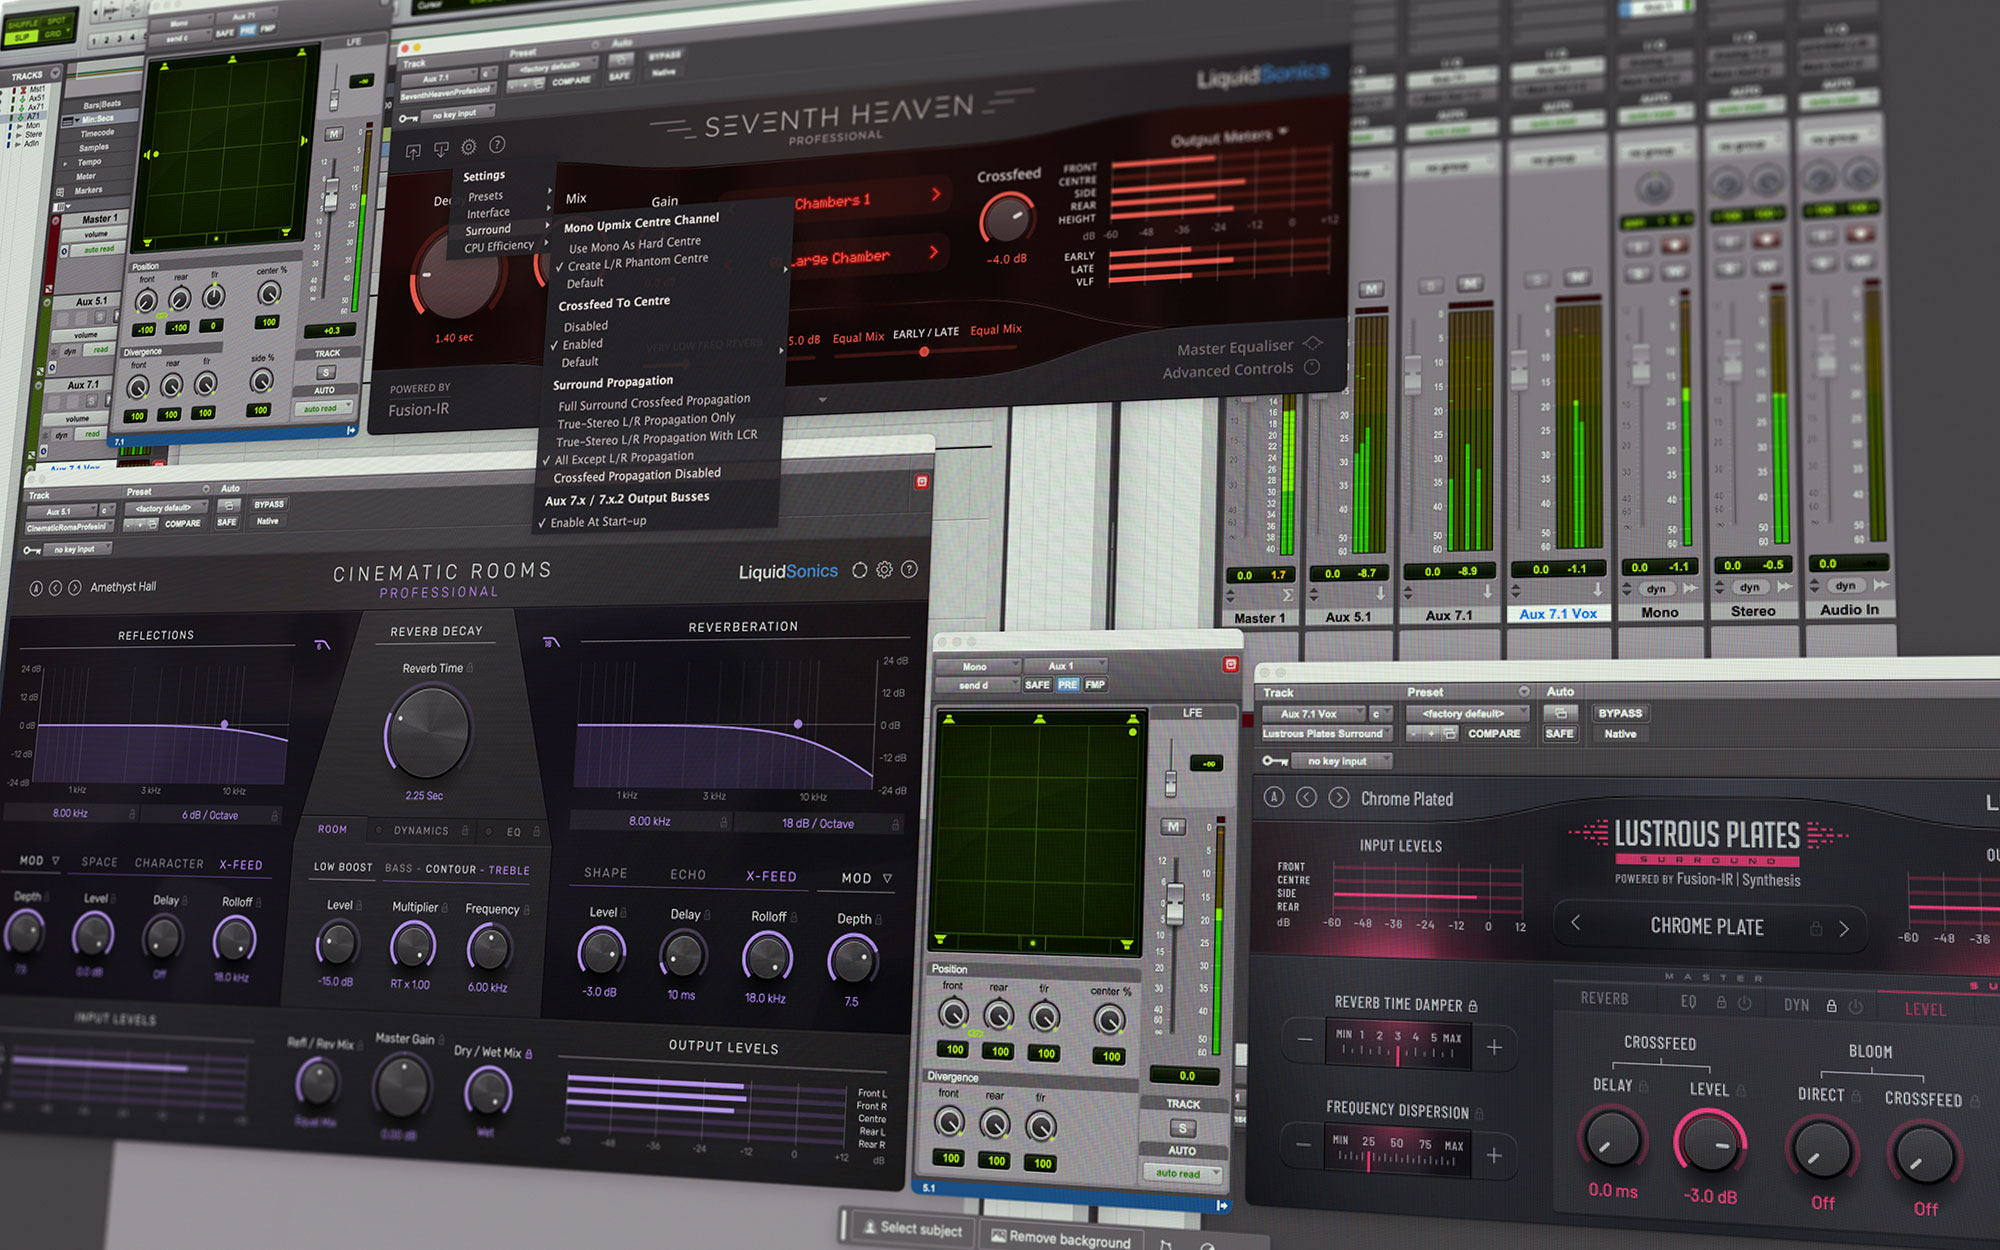
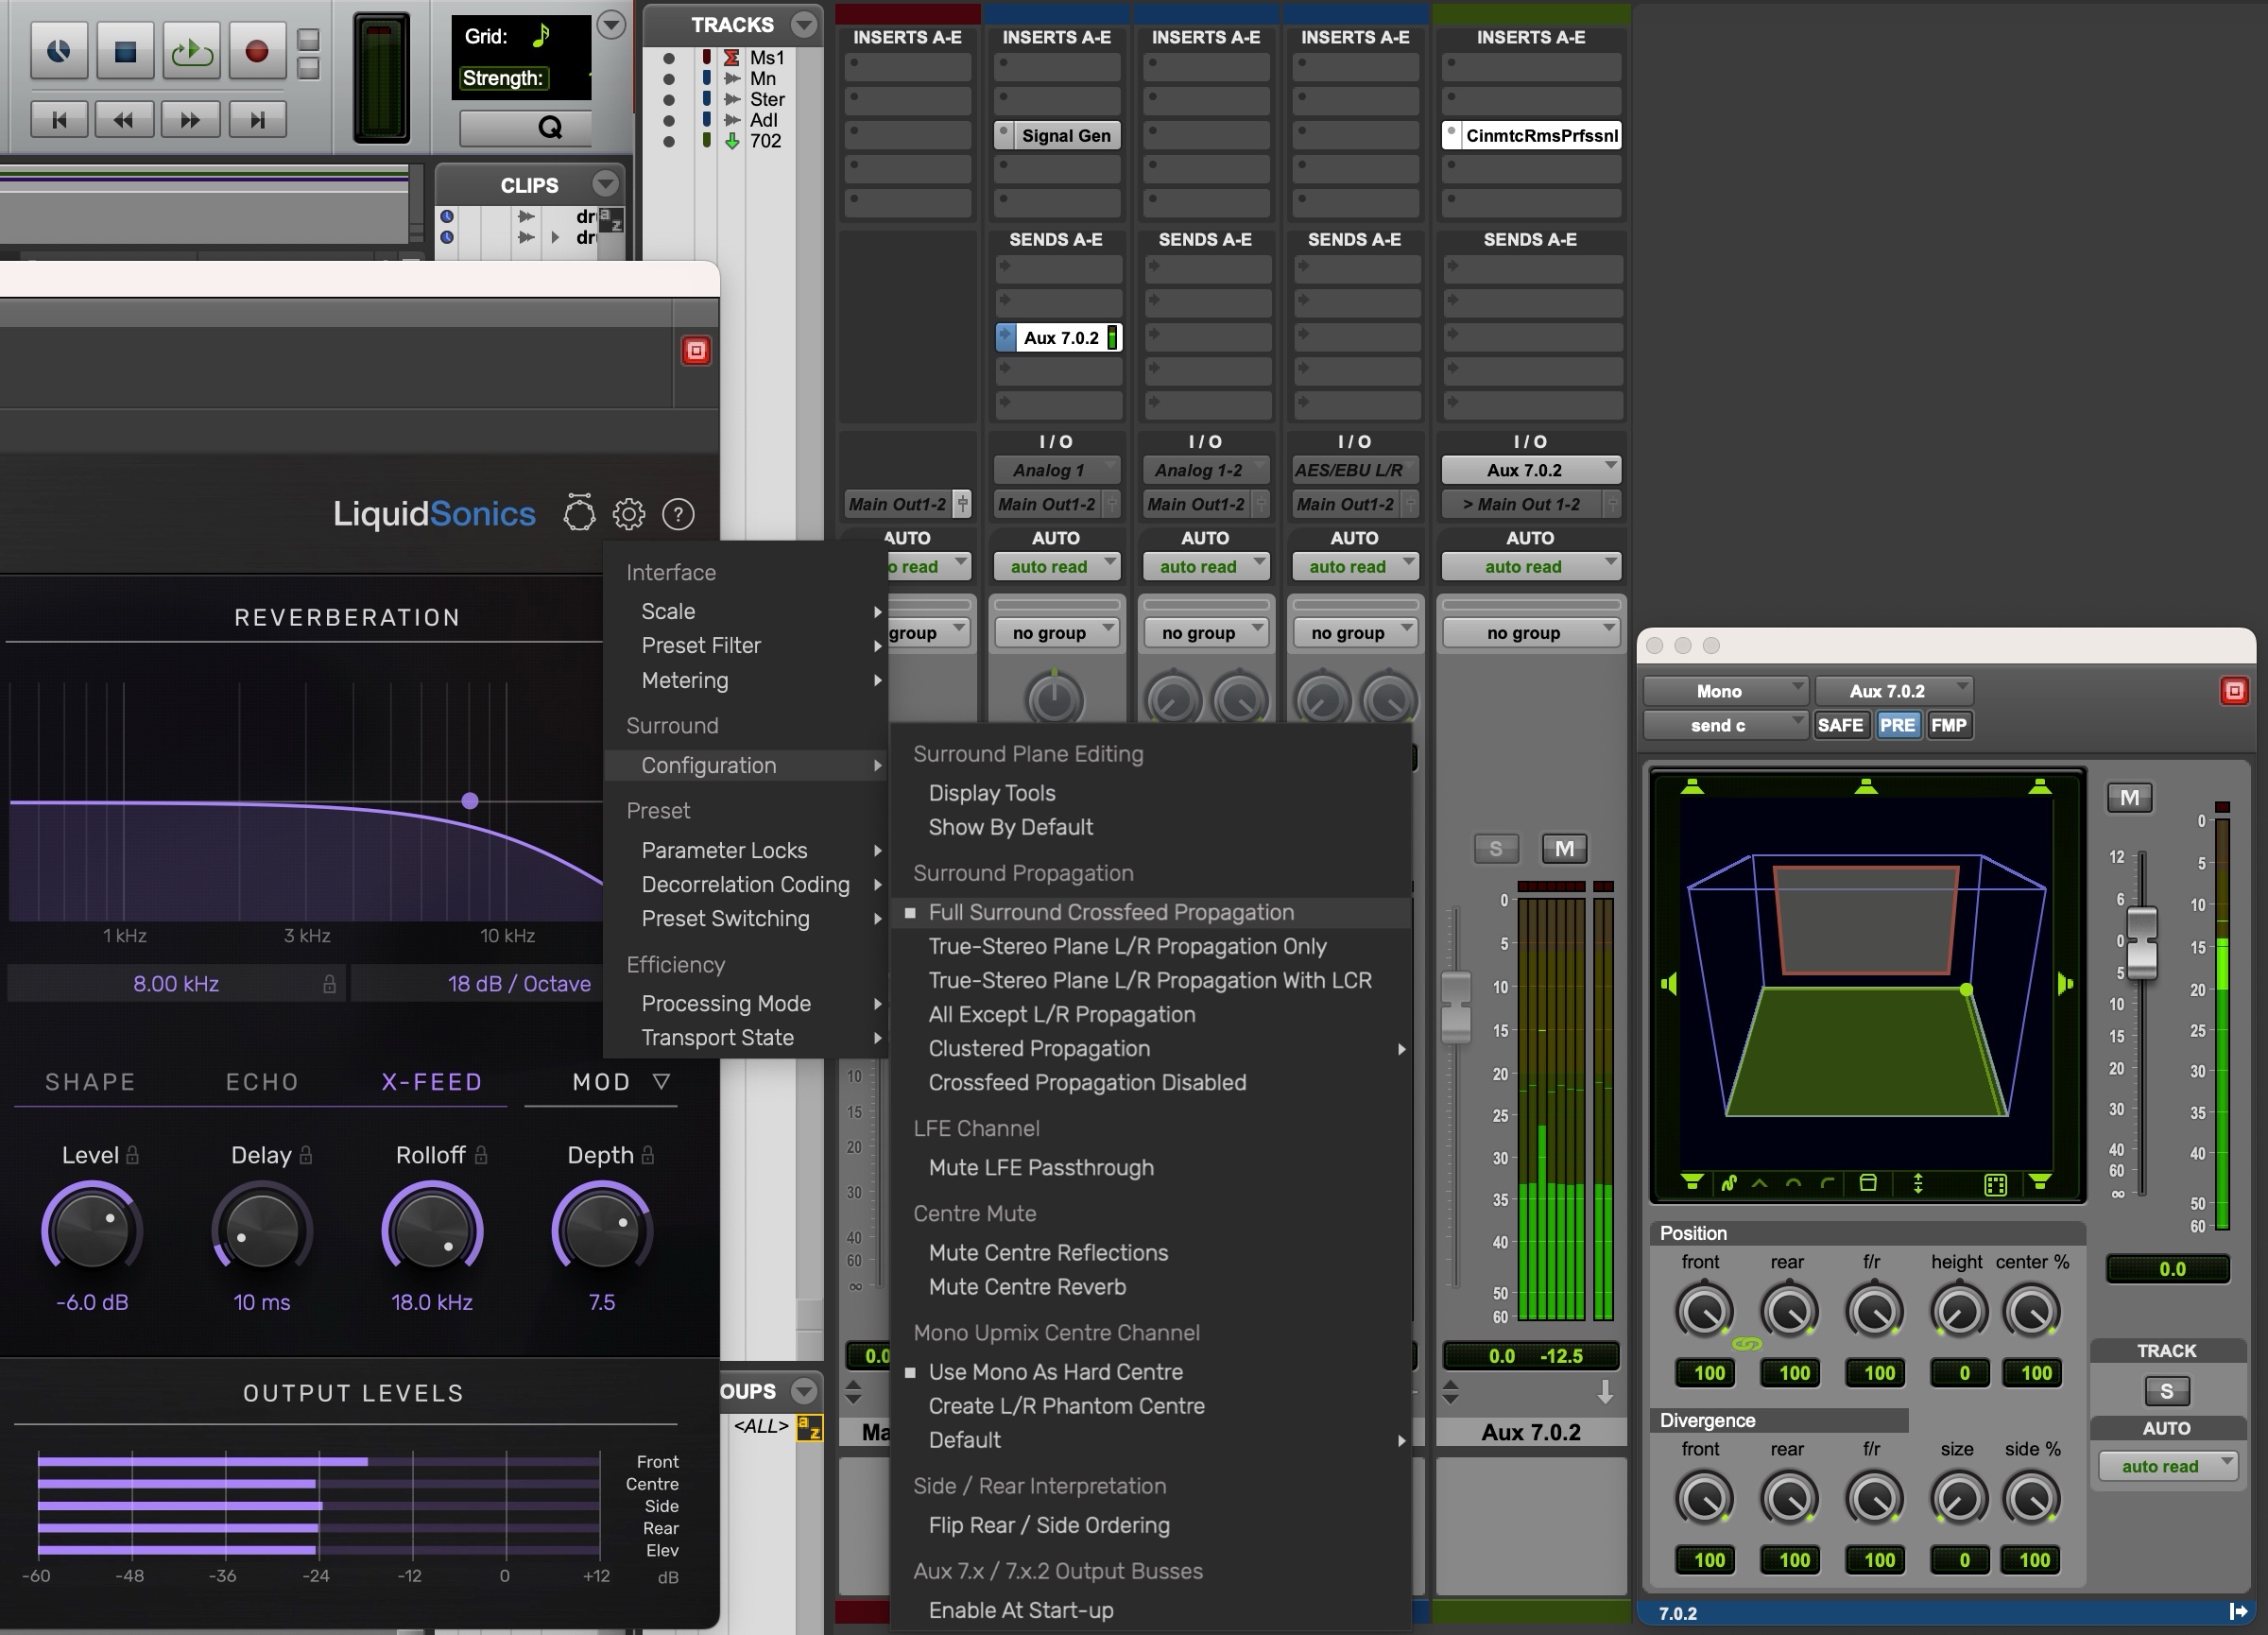
To give a more visual representation of the modes consider the screenshots below where different modes are active in a Pro Tools session. The send position of the panner shows which discrete channel audio is presented to the reverb from, and the mixer tool clearly illustrates the channels reverb is produced for. In all cases the crossfeed level has been deliberately set lower than usual, so it is clear which channel is processing primary reverberation (i.e. on the loudest channel shown in the mixer meters), versus which are secondary cross-feeds (i.e. the lower levels on the meters), versus which are silent due to a complete lack of propagation.
1. Full surround propagation
We see that sound entering the right channel creates reverberation on the primary channel, and propagating reverb into the other channels with 6 dB of attenuation. This is similar to the way many traditional surround reverbs behave where the design prohibits discrete control over the crossfeed elements.
2. True-stereo plane isolation
When engaging the true stereo plane isolation mode (without LCR) the reverb appears on the front right channel in response to a front right dry source and propagates only across the front L/R stereo plane meaning that we observe reverb at a lower level on the front left channel. There is no other crossfeed throughout the system, and the centre behaves as an isolated mono reverb.
A: Audio panned to front.
No propagation occurs into the side, rear or elevated planes as it is restricted to the front plane only.
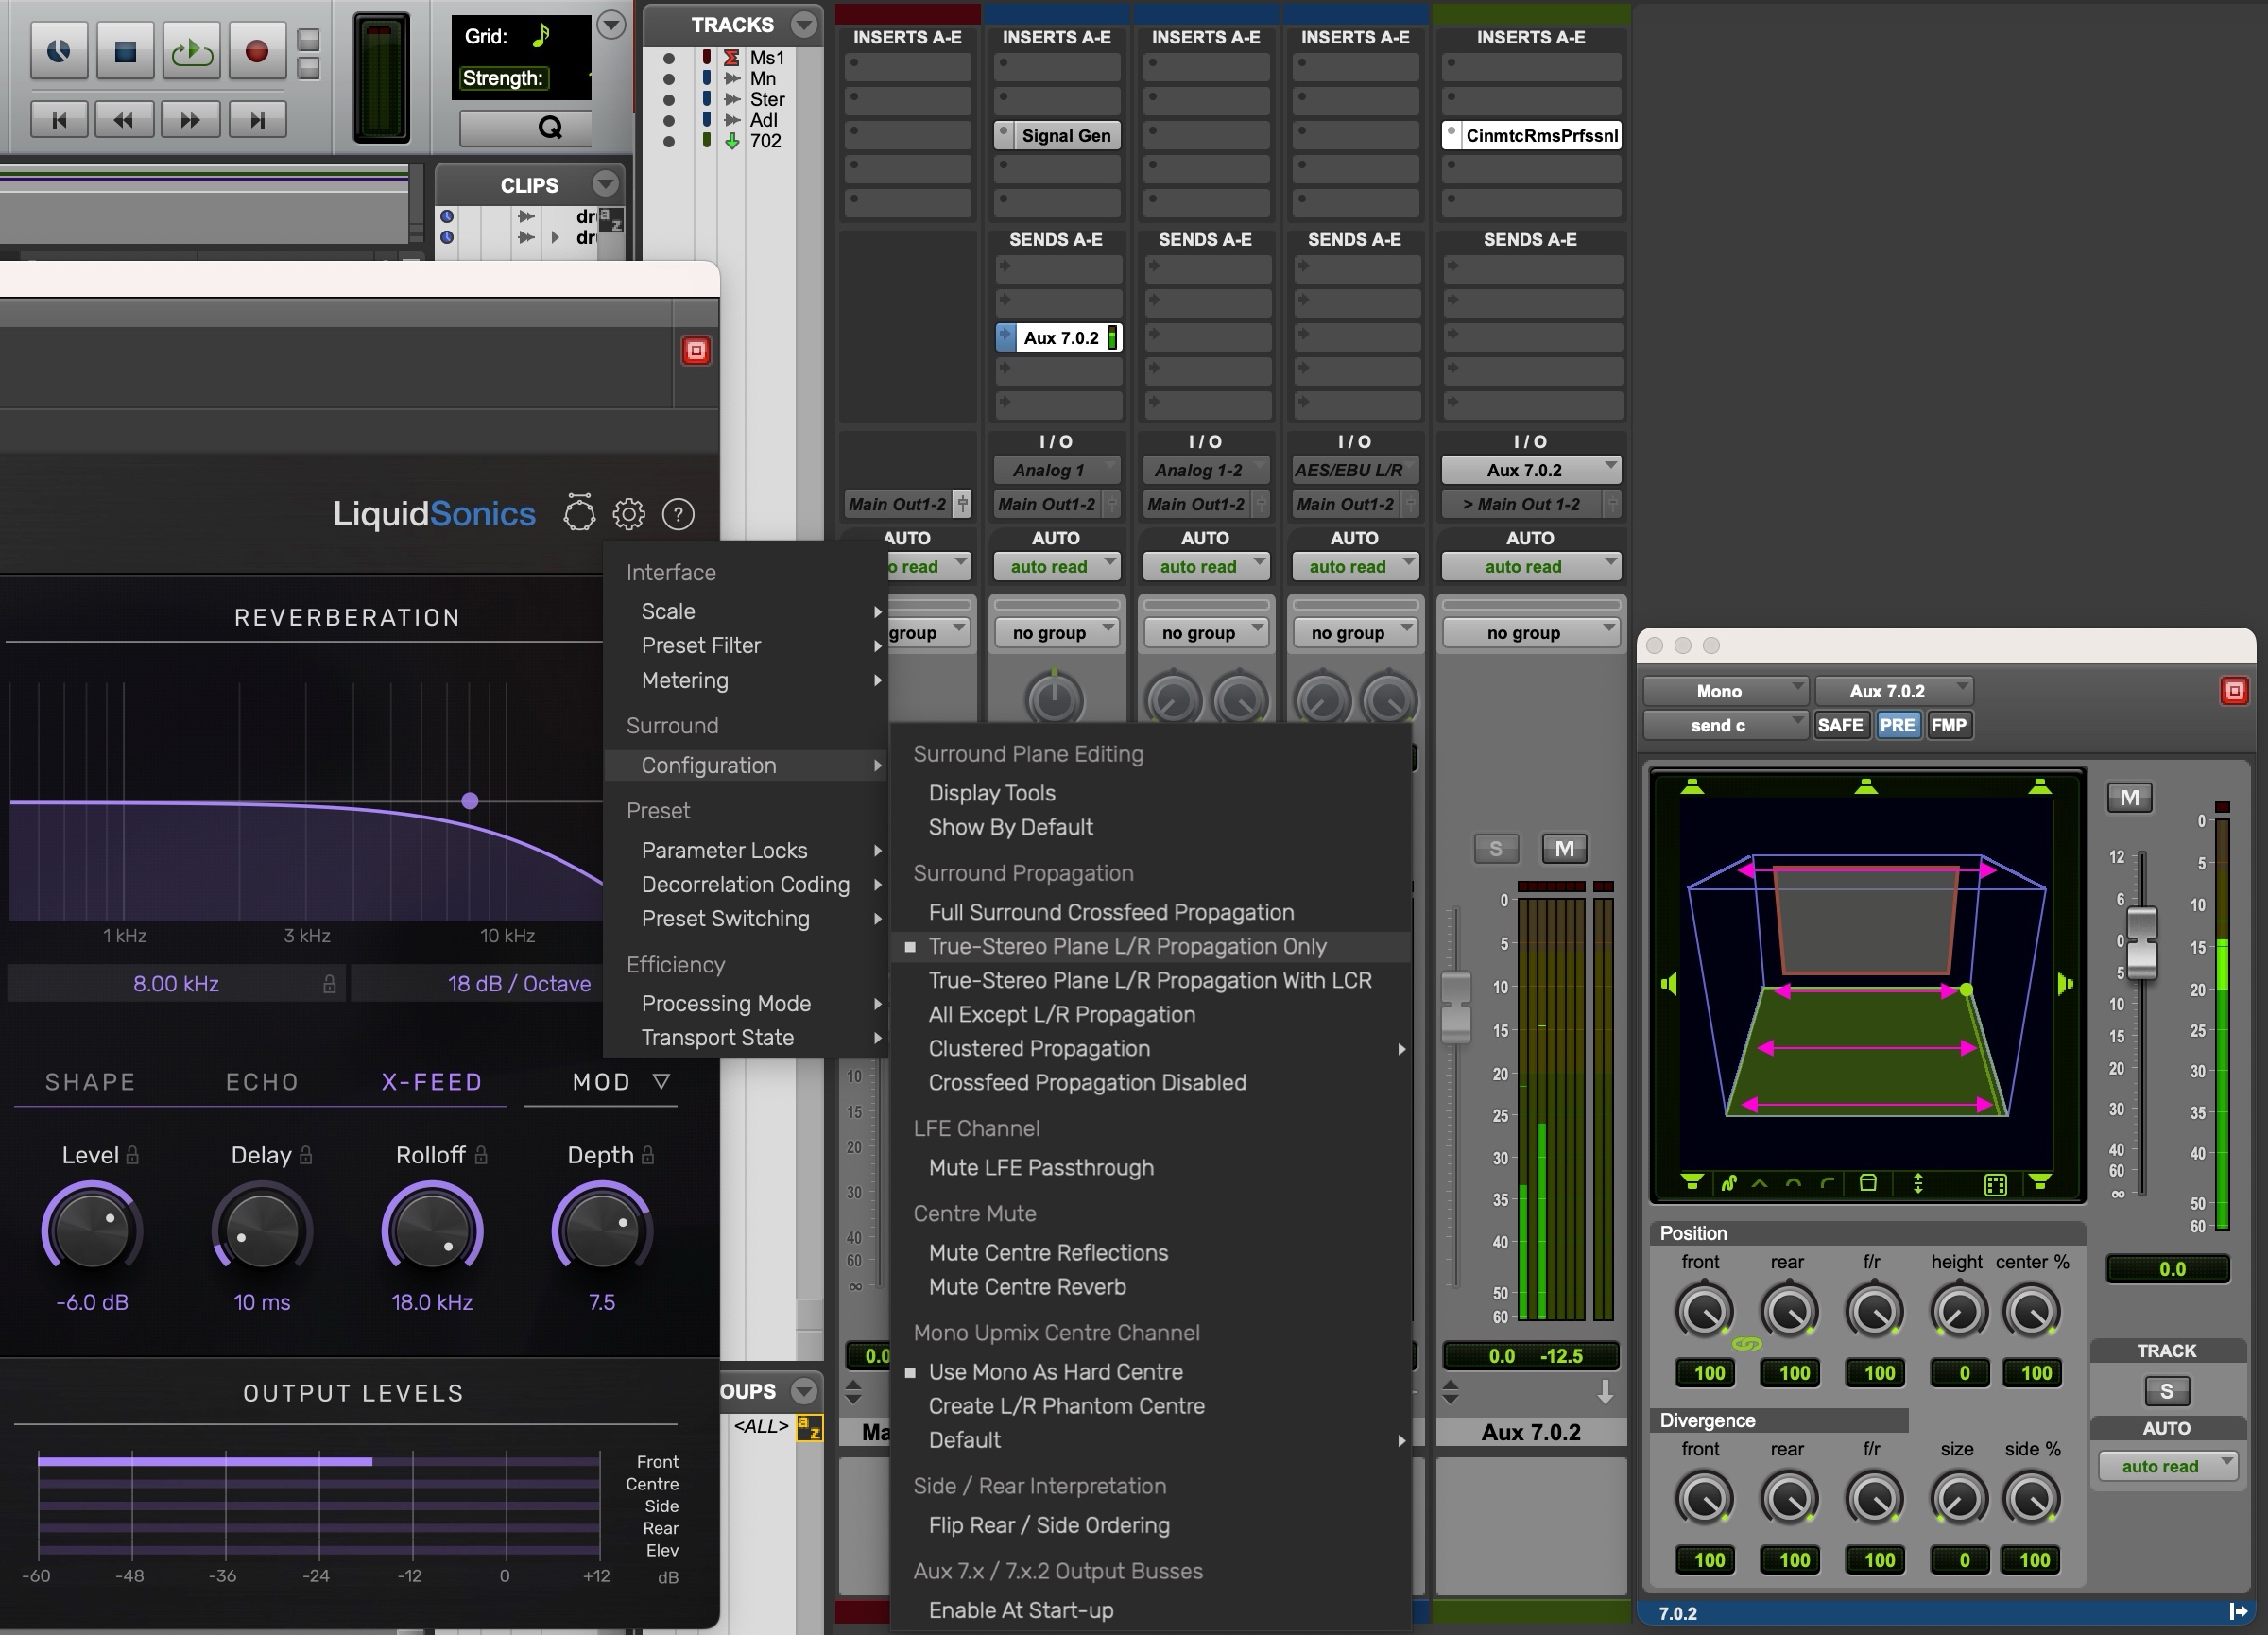
B. Audio panned to left side channel
Panning audio into the left side channel, we observe that reverb is only present in the left/right side plane. Hence the fronts and sides are logically controlled with the same reverb settings and have different correlation properties, but are being processed independently of one another.

3. True-stereo plane isolation with LCR
Engaging the stereo planes with LCR propagation, we observe that reverb additionally bleeds into the centre when audio is presented on the front left/right channels. We also note that when the centre channel receives audio, reverb will be processed into the front left and right channels.
A: Audio panned to front right – shows behaviour as though the fronts are acting as a 3-channel LCR reverb with audio crossfeeding to the centre and left channel.

B: Audio panned to centre – reverb crossfeeds into the left and right from the centre but no further.
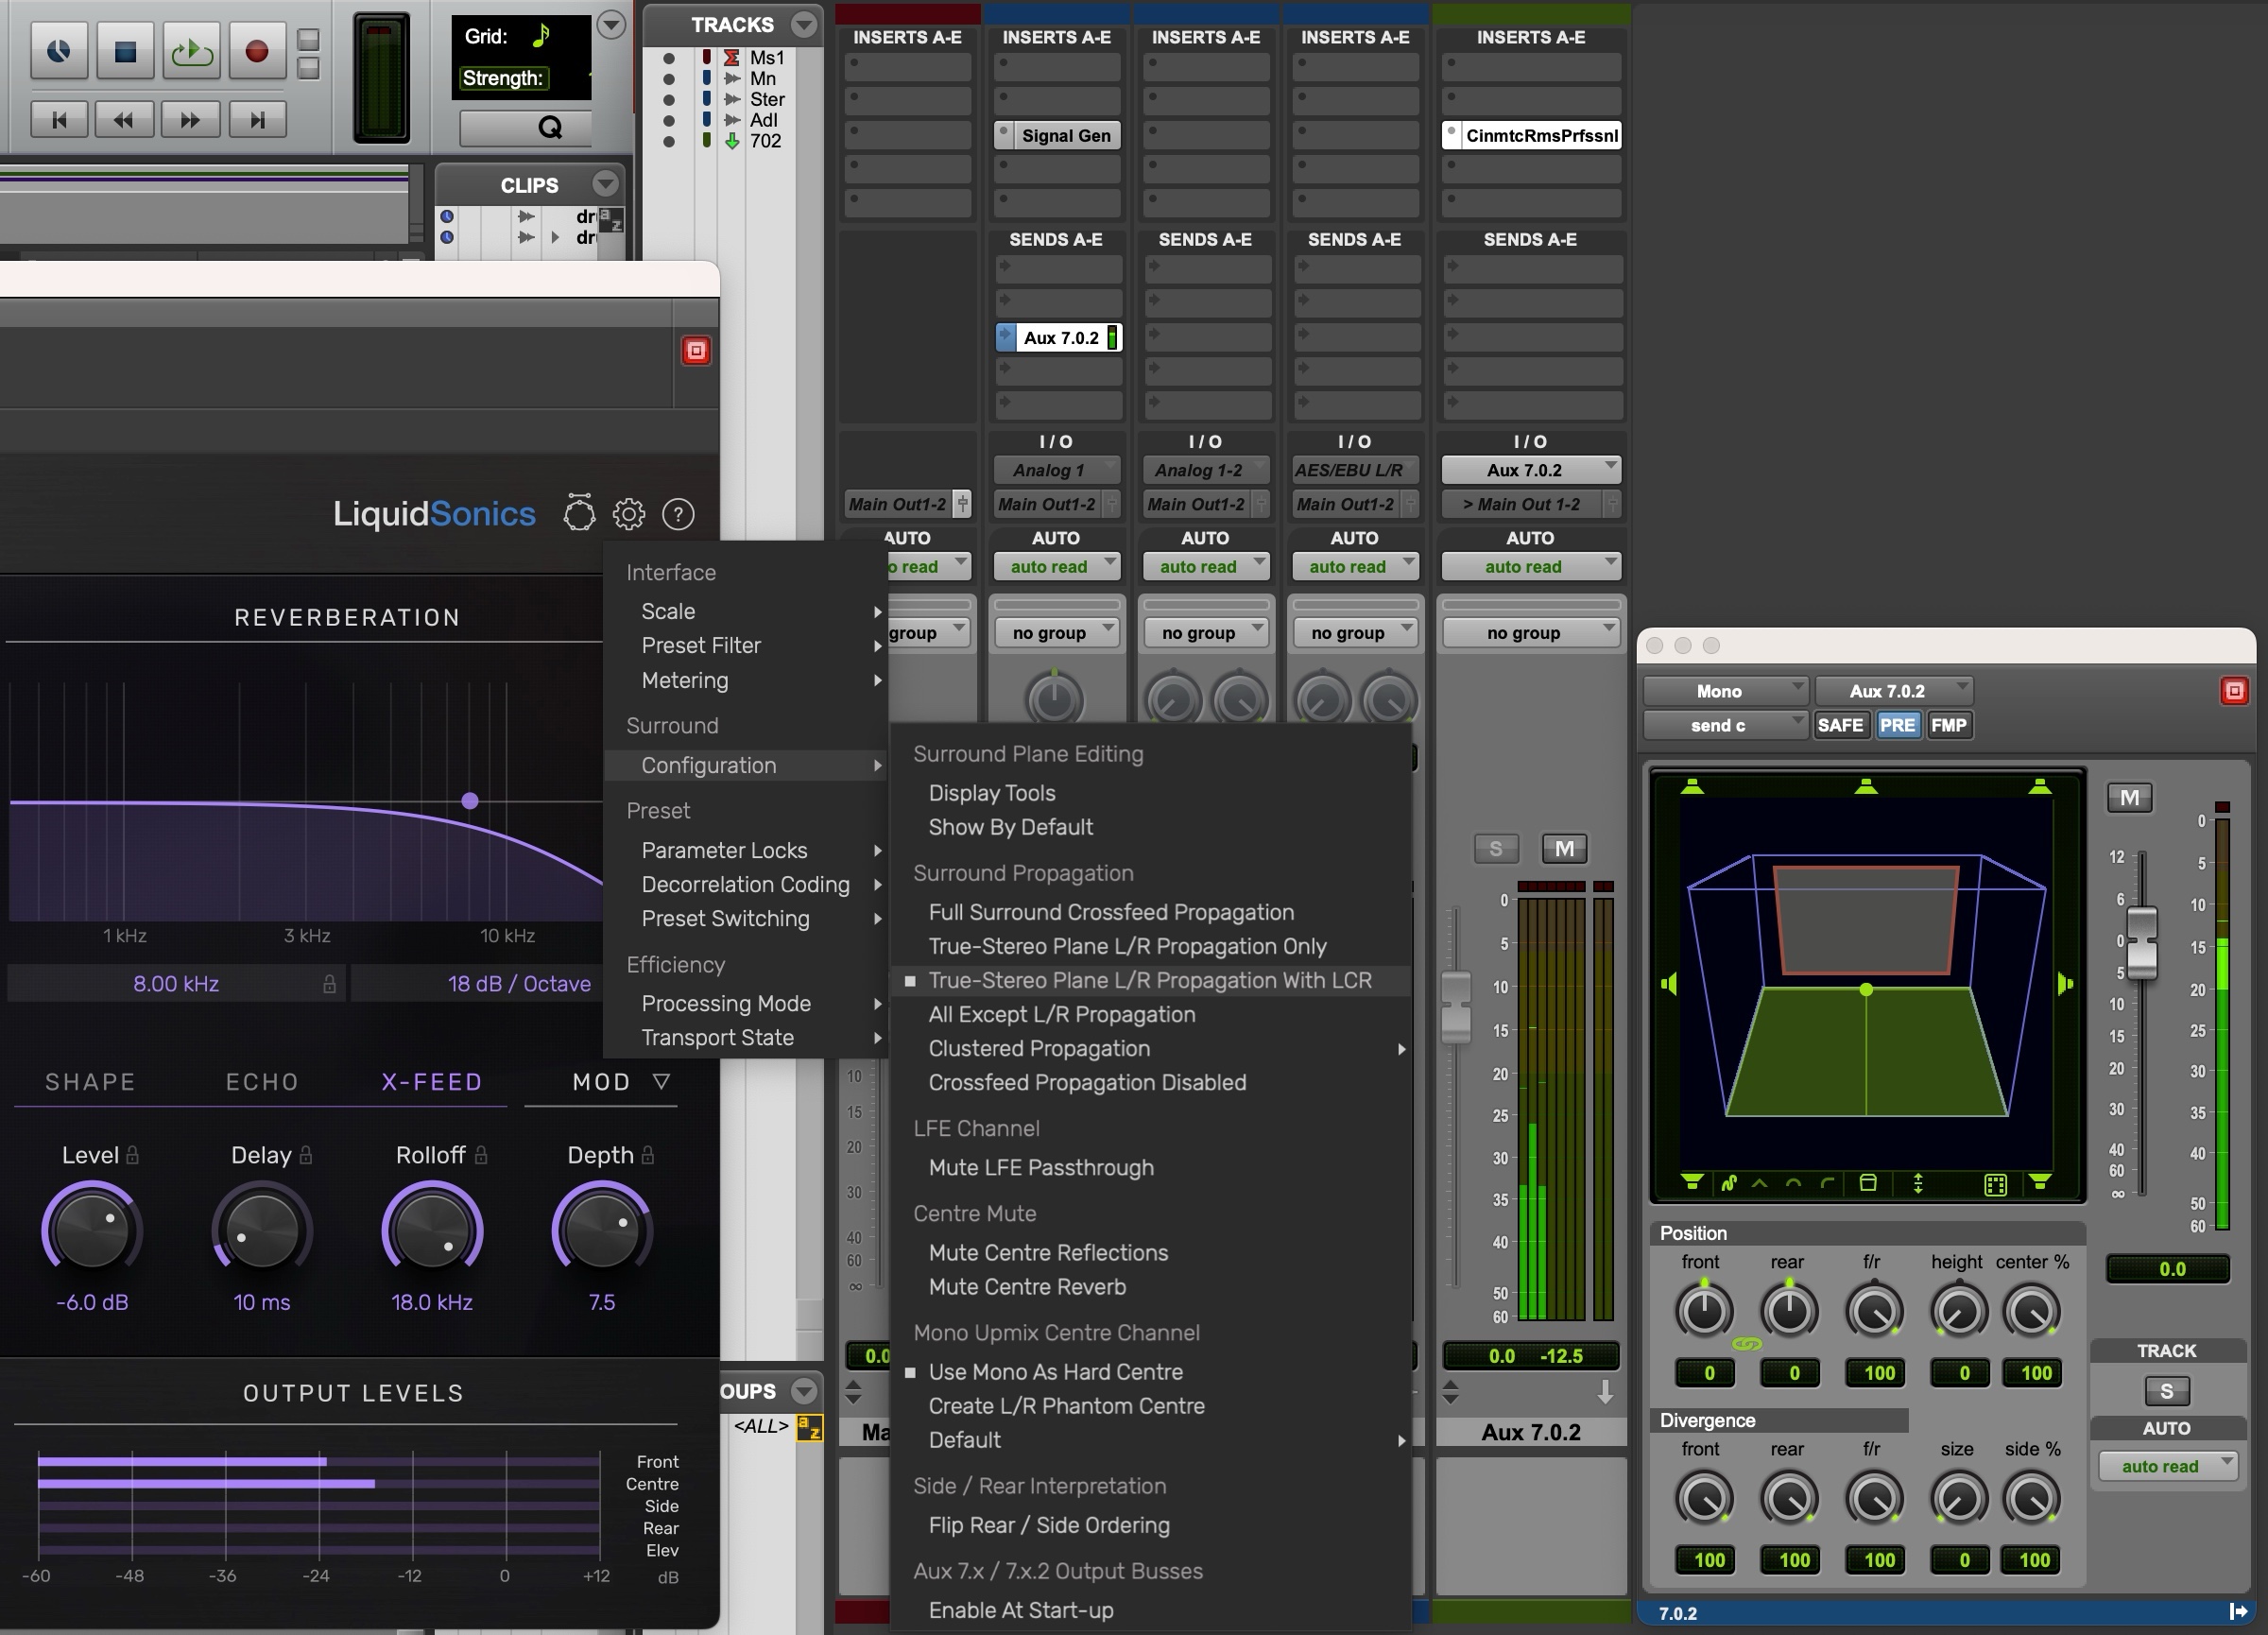
C: Audio panned to rear – displays true-stereo propagation without any front-back propagation illustrating that the rears are fully isolated from the other discrete channels.

Additional notes – you can mute reverb processing in the centre channel with “Mute Centre Reverb” and “Mute Centre Reflections” – therefore it is possible to have this LCR style reverb set up so that the centre stays dry, but any audio received in the centre will throw reverb to the front left and right channels but no further.
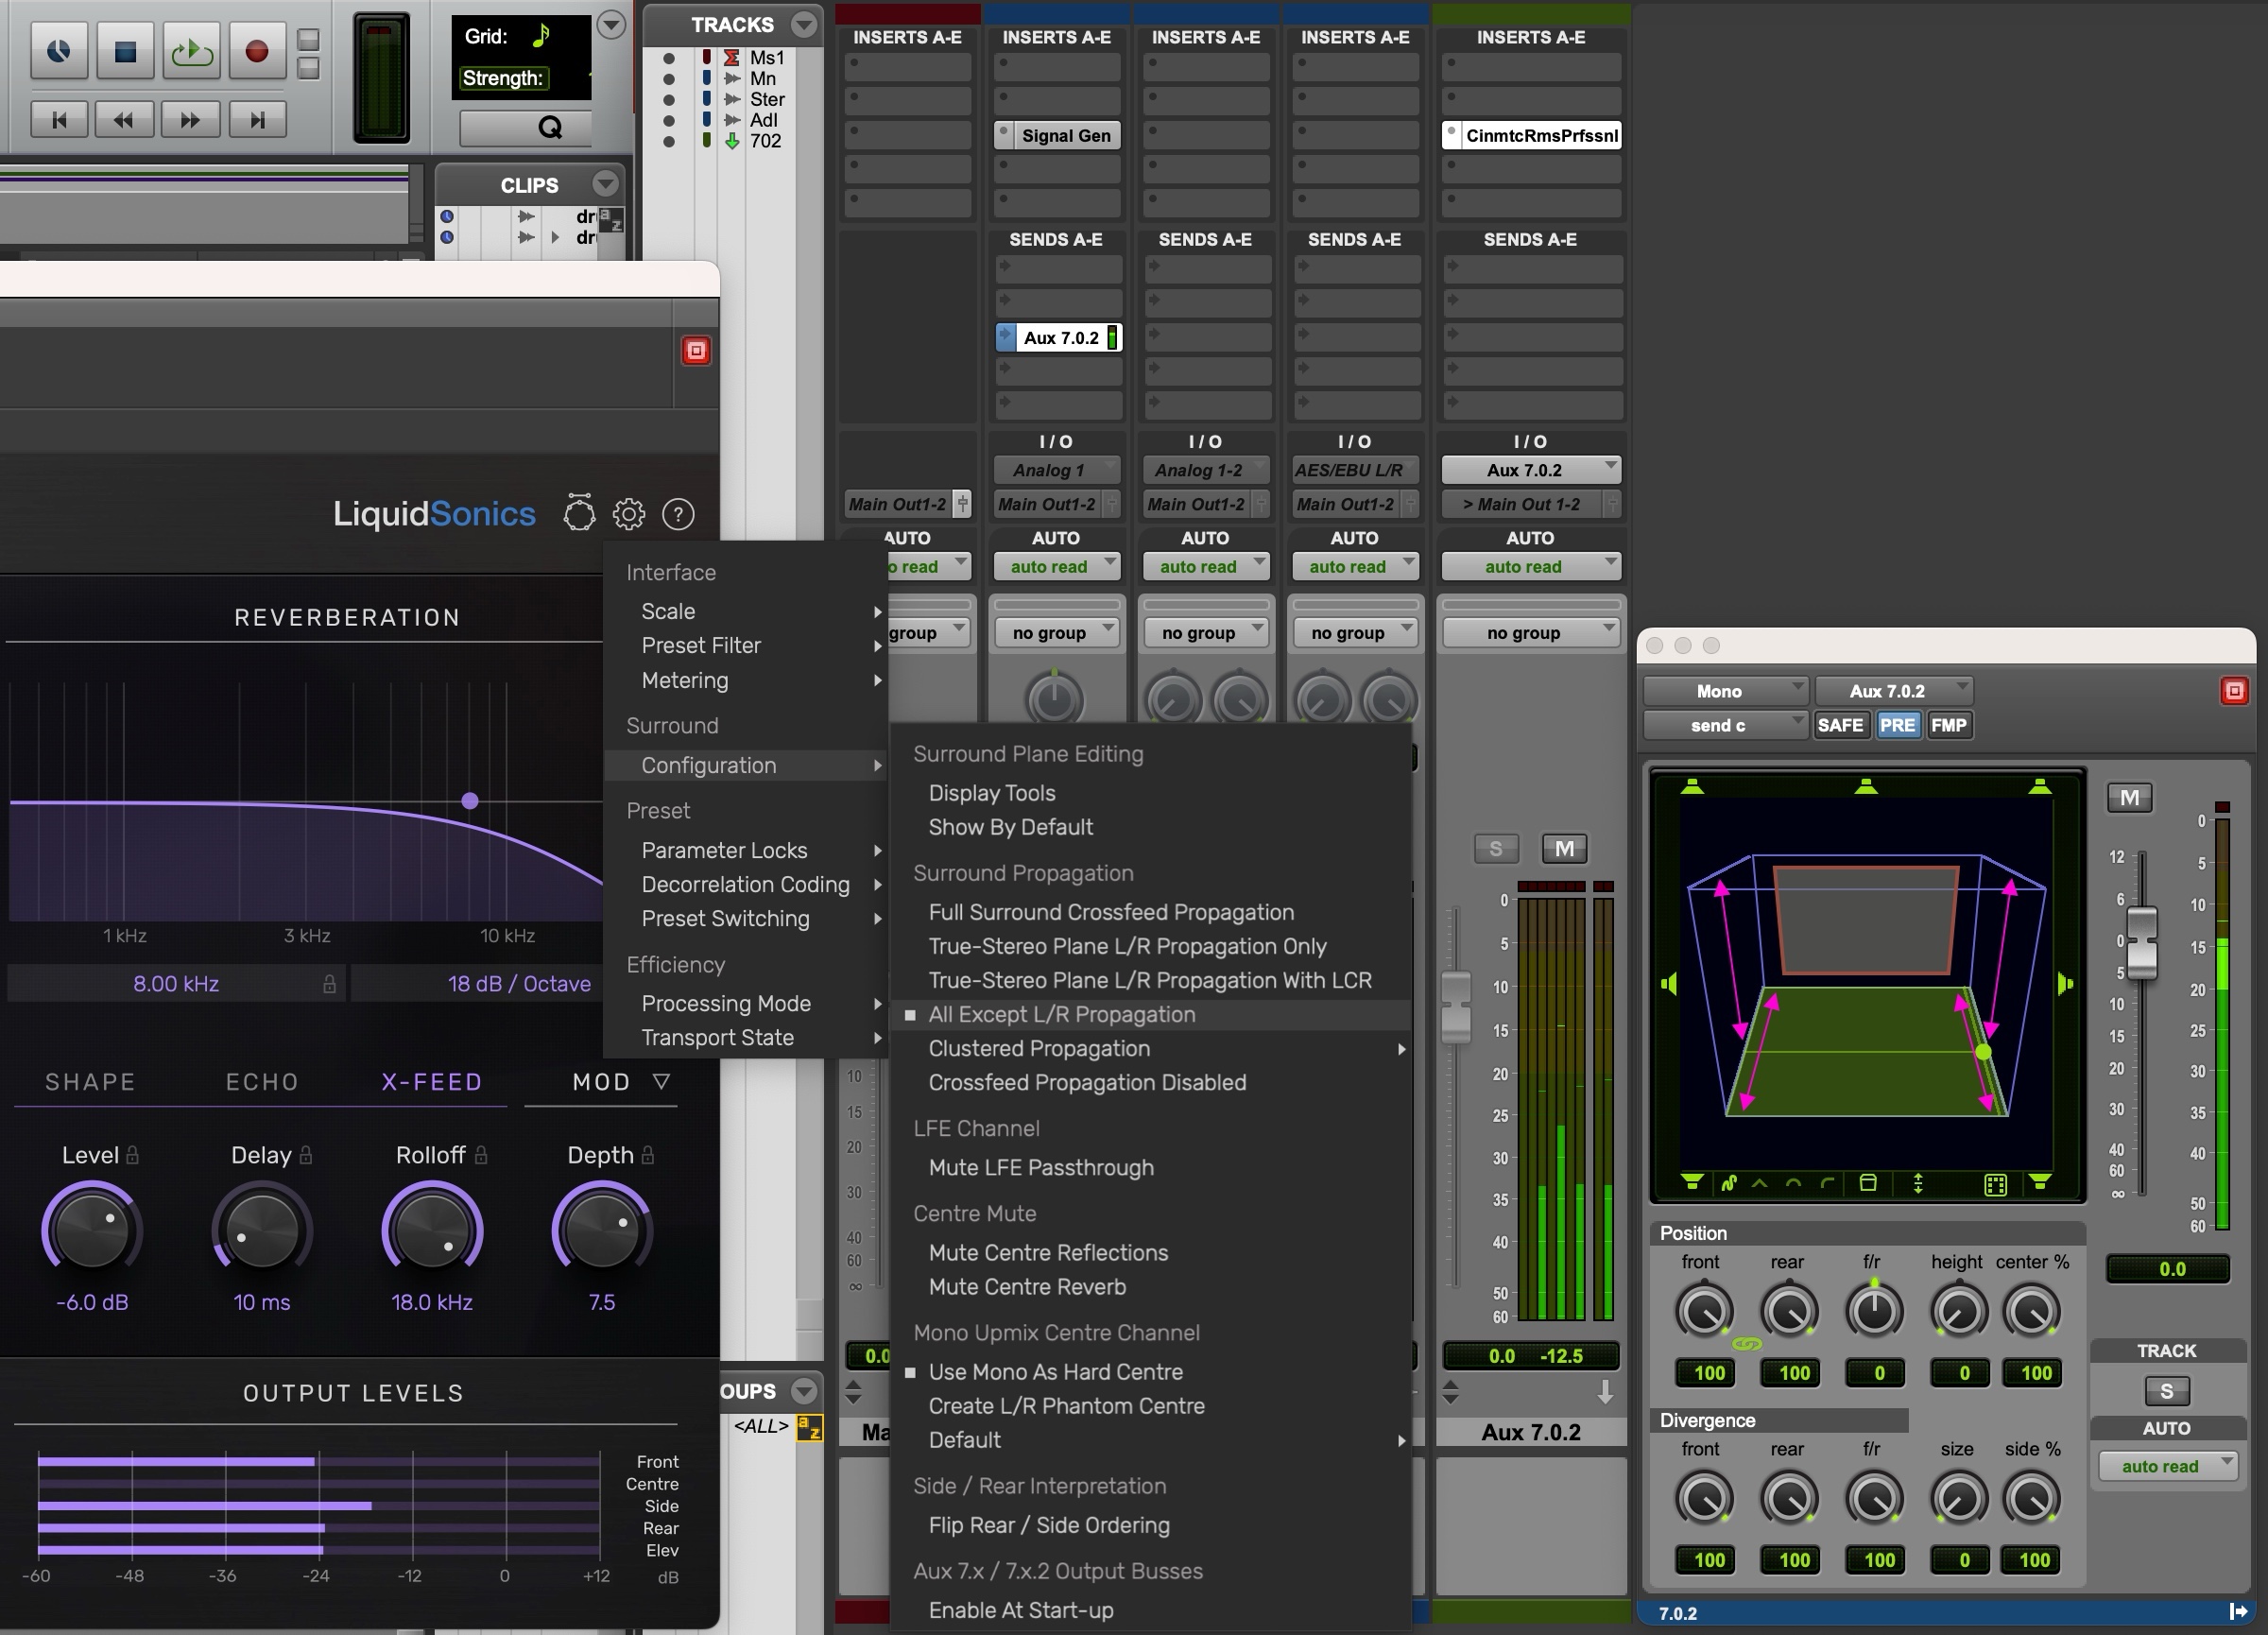
4. All except L/R Propagation
Audio panned into the right side channel propagates into the right front, right rear, and right elevated channel. No reverb propagates across the x axis (i.e. across left/right boundaries or into the centre).
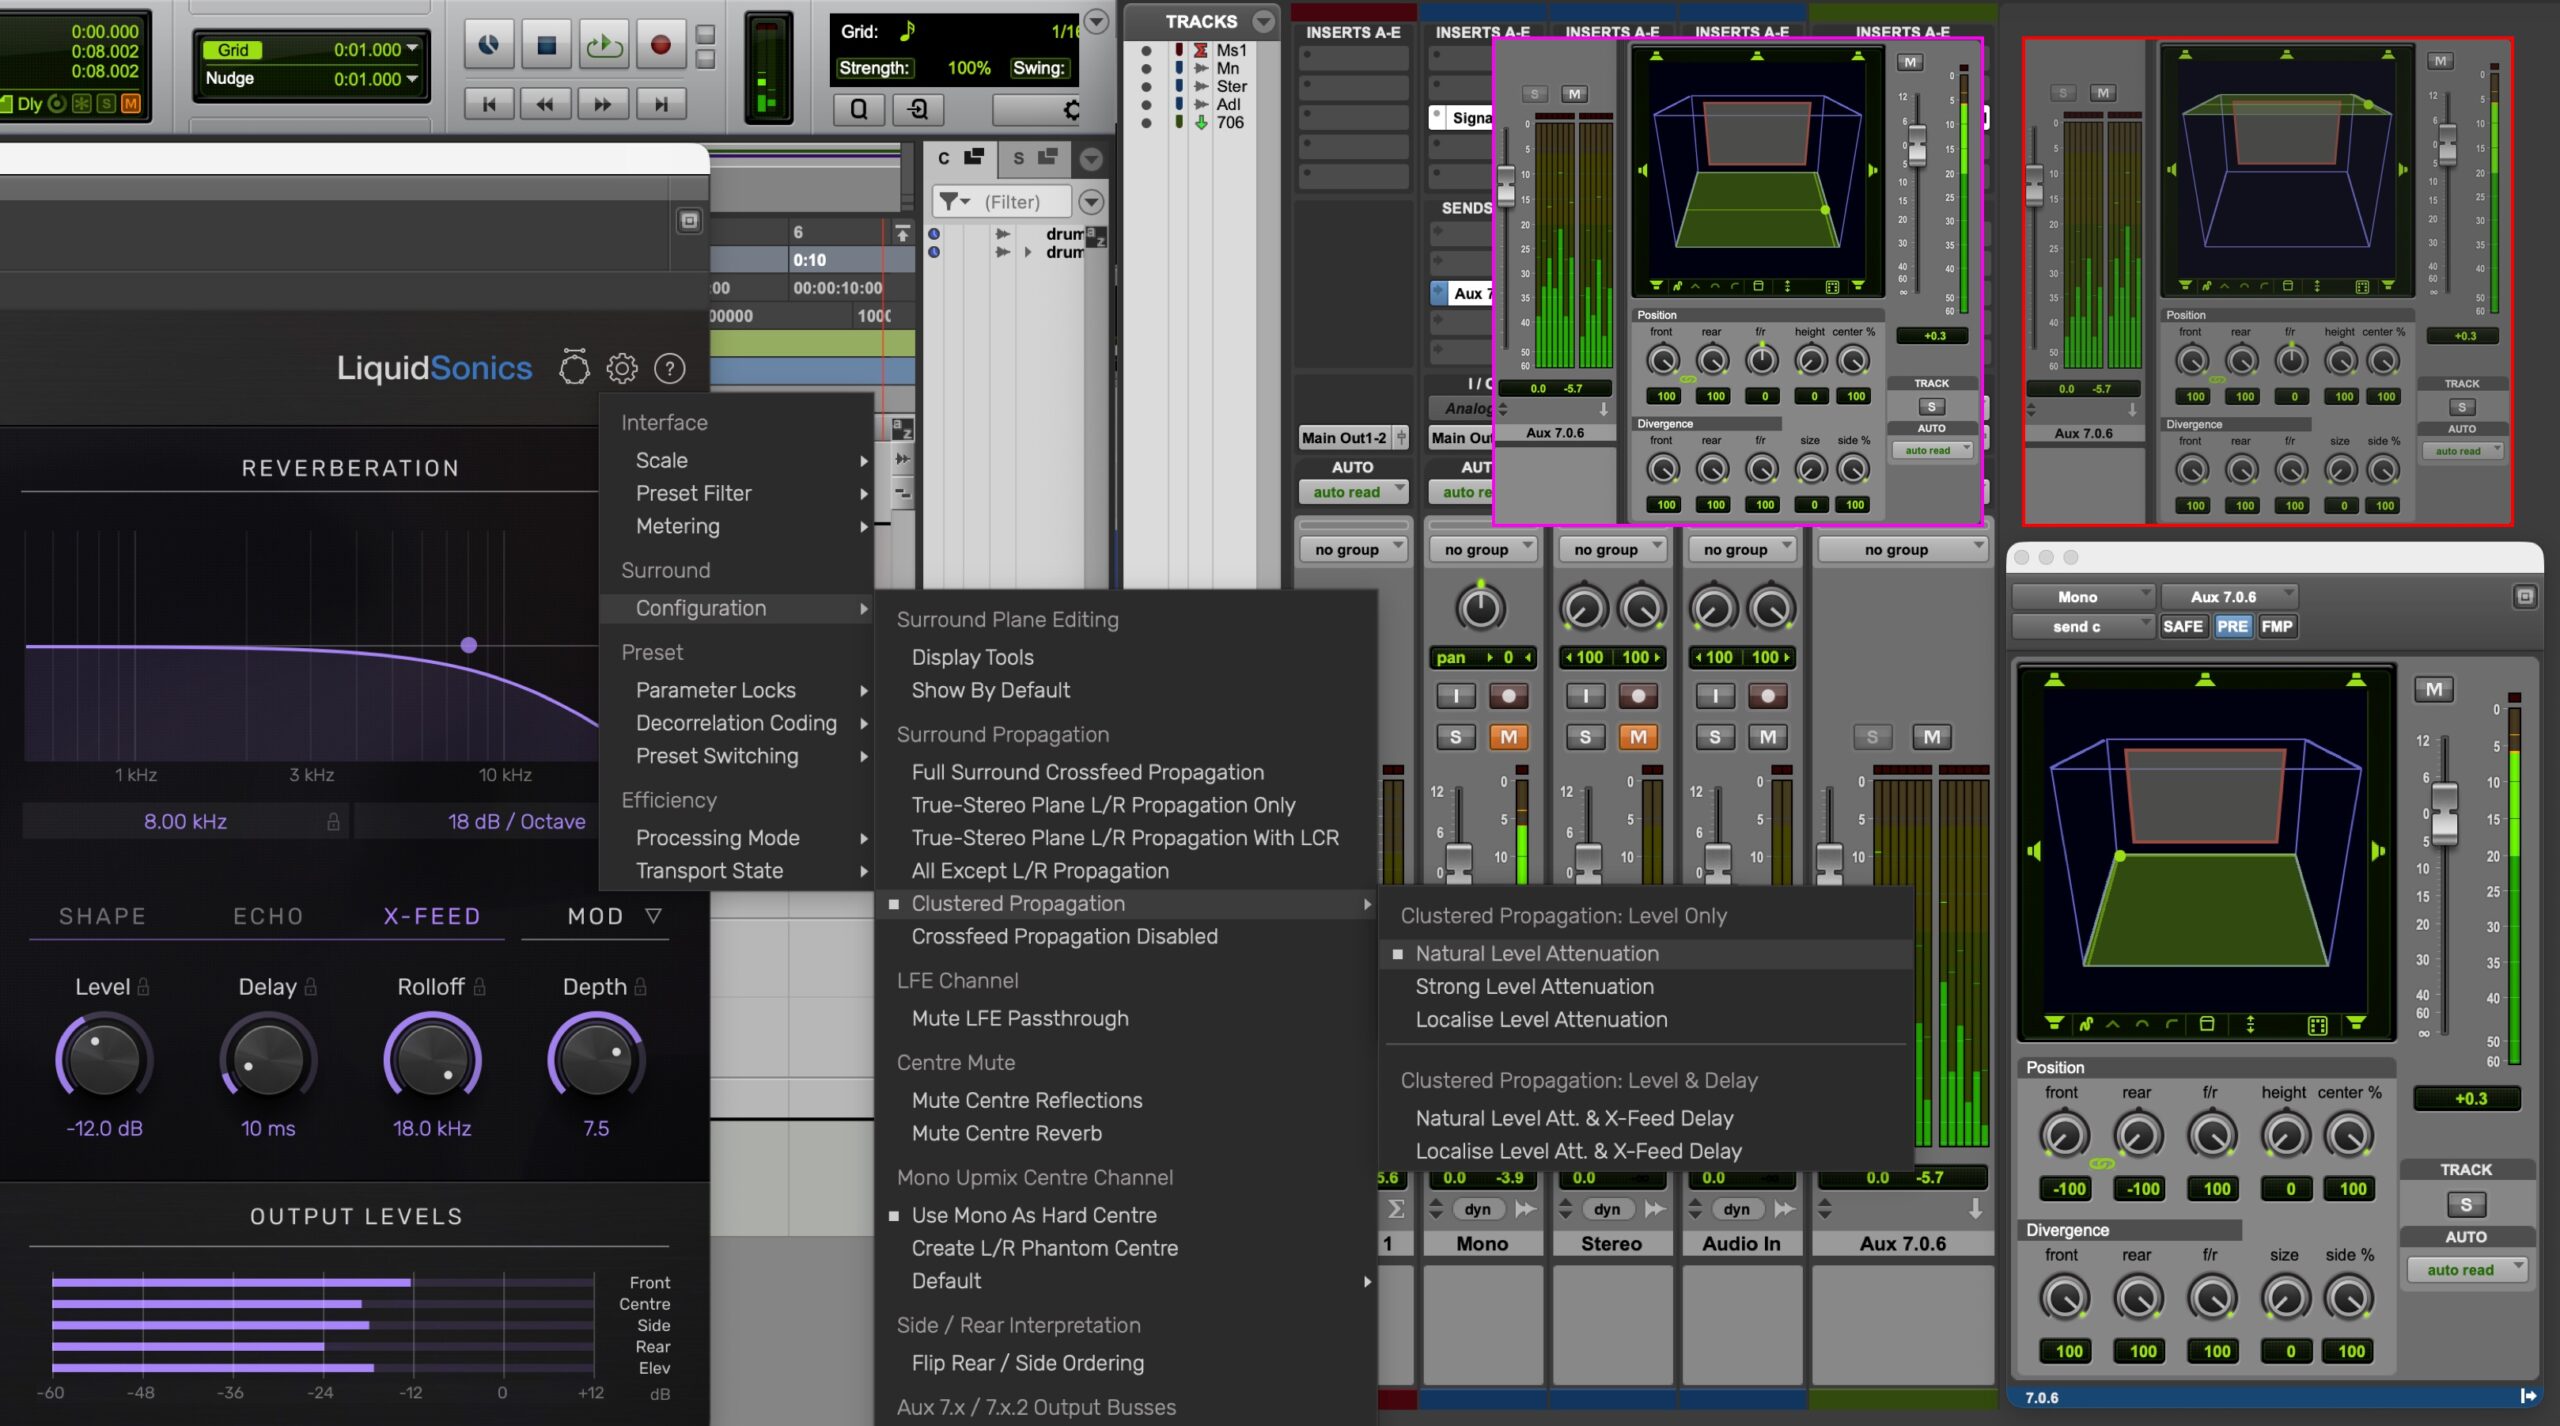
5. Clustered Propagation
Level Only Modes
Reverbs typically maintain a broadly consistent level throughout the space with respect to crossfeed level, especially in the late diffuse field, providing a neutrally balanced amount of reverb in adjacent channels irrespective of their distance from the ingress channel as often will be observed in late diffuse fields.
The clustered propagation modes in Cinematic Rooms Professional allow reflections and reverberation to gather most strongly around the ingress point. For example, in a 7.1 bed, audio received in the front left channel can crossfeed into the rear channels at a lower level than it does in the side channels. In a 7.1.6 configuration, audio that makes its way to the top rear surrounds can be quieter still.
The degree to which this is used can be set independently for the reflections and late reverb which can be very beneficial in many practical mix workflow situations, including:
- Large cinematic spaces: early reflections can be configured to remain closely attached to the direct sound around the pan focal point, while reflections from more distant surfaces are noticeably attenuated. The late field can then be set low in the mix with a broadly consistent diffuse field, enhancing the sense of panning into a vast acoustic environment.
- Intimate or claustrophobic spaces: early reflections can be made prominent and enveloping, surrounding the listener from all directions with a fairly consistent crossfeed presentation. The late decay may then be mixed louder and more focused toward the pan focal point channel, maintaining intimacy and immediacy without excessively spreading energy across the entire field for a longer time which could pull attention away from the pan position with excessive late reverberation.
- Score mixing with layered reverbs: when combining multiple reverbs, the clustered propagation controls allow the engineer to maintain spatial focus even in dense mixes by ensuring some reflection and/or late diffuse layers present most noticeably close to the pan position intended for the instrument’s position on stage. This will often allow additional reverb layers to be used without flooding the mix with excessive late decay and provide a more nuanced decay profile with enhanced clarity.
To illustrate this concept visually we again show a Pro Tools session with standard level metering. The example below shows a source panned to the front left – notice that the reverb level in the rear channels is lower than in the sides, and lower still in the elevated rear channels.
The purple box-out demonstrates the effect of panning to the right side: the front right, rear right, and top side right channels maintain similar levels, as they are approximately equidistant from the source. In contrast, the front left and rear left channels are quieter, with the lowest levels observed in the top front left and top rear left channels.
A further example, shown in red, illustrates the behaviour when panning toward the top rear surround position exhibiting generally louder levels than in the ground channels.
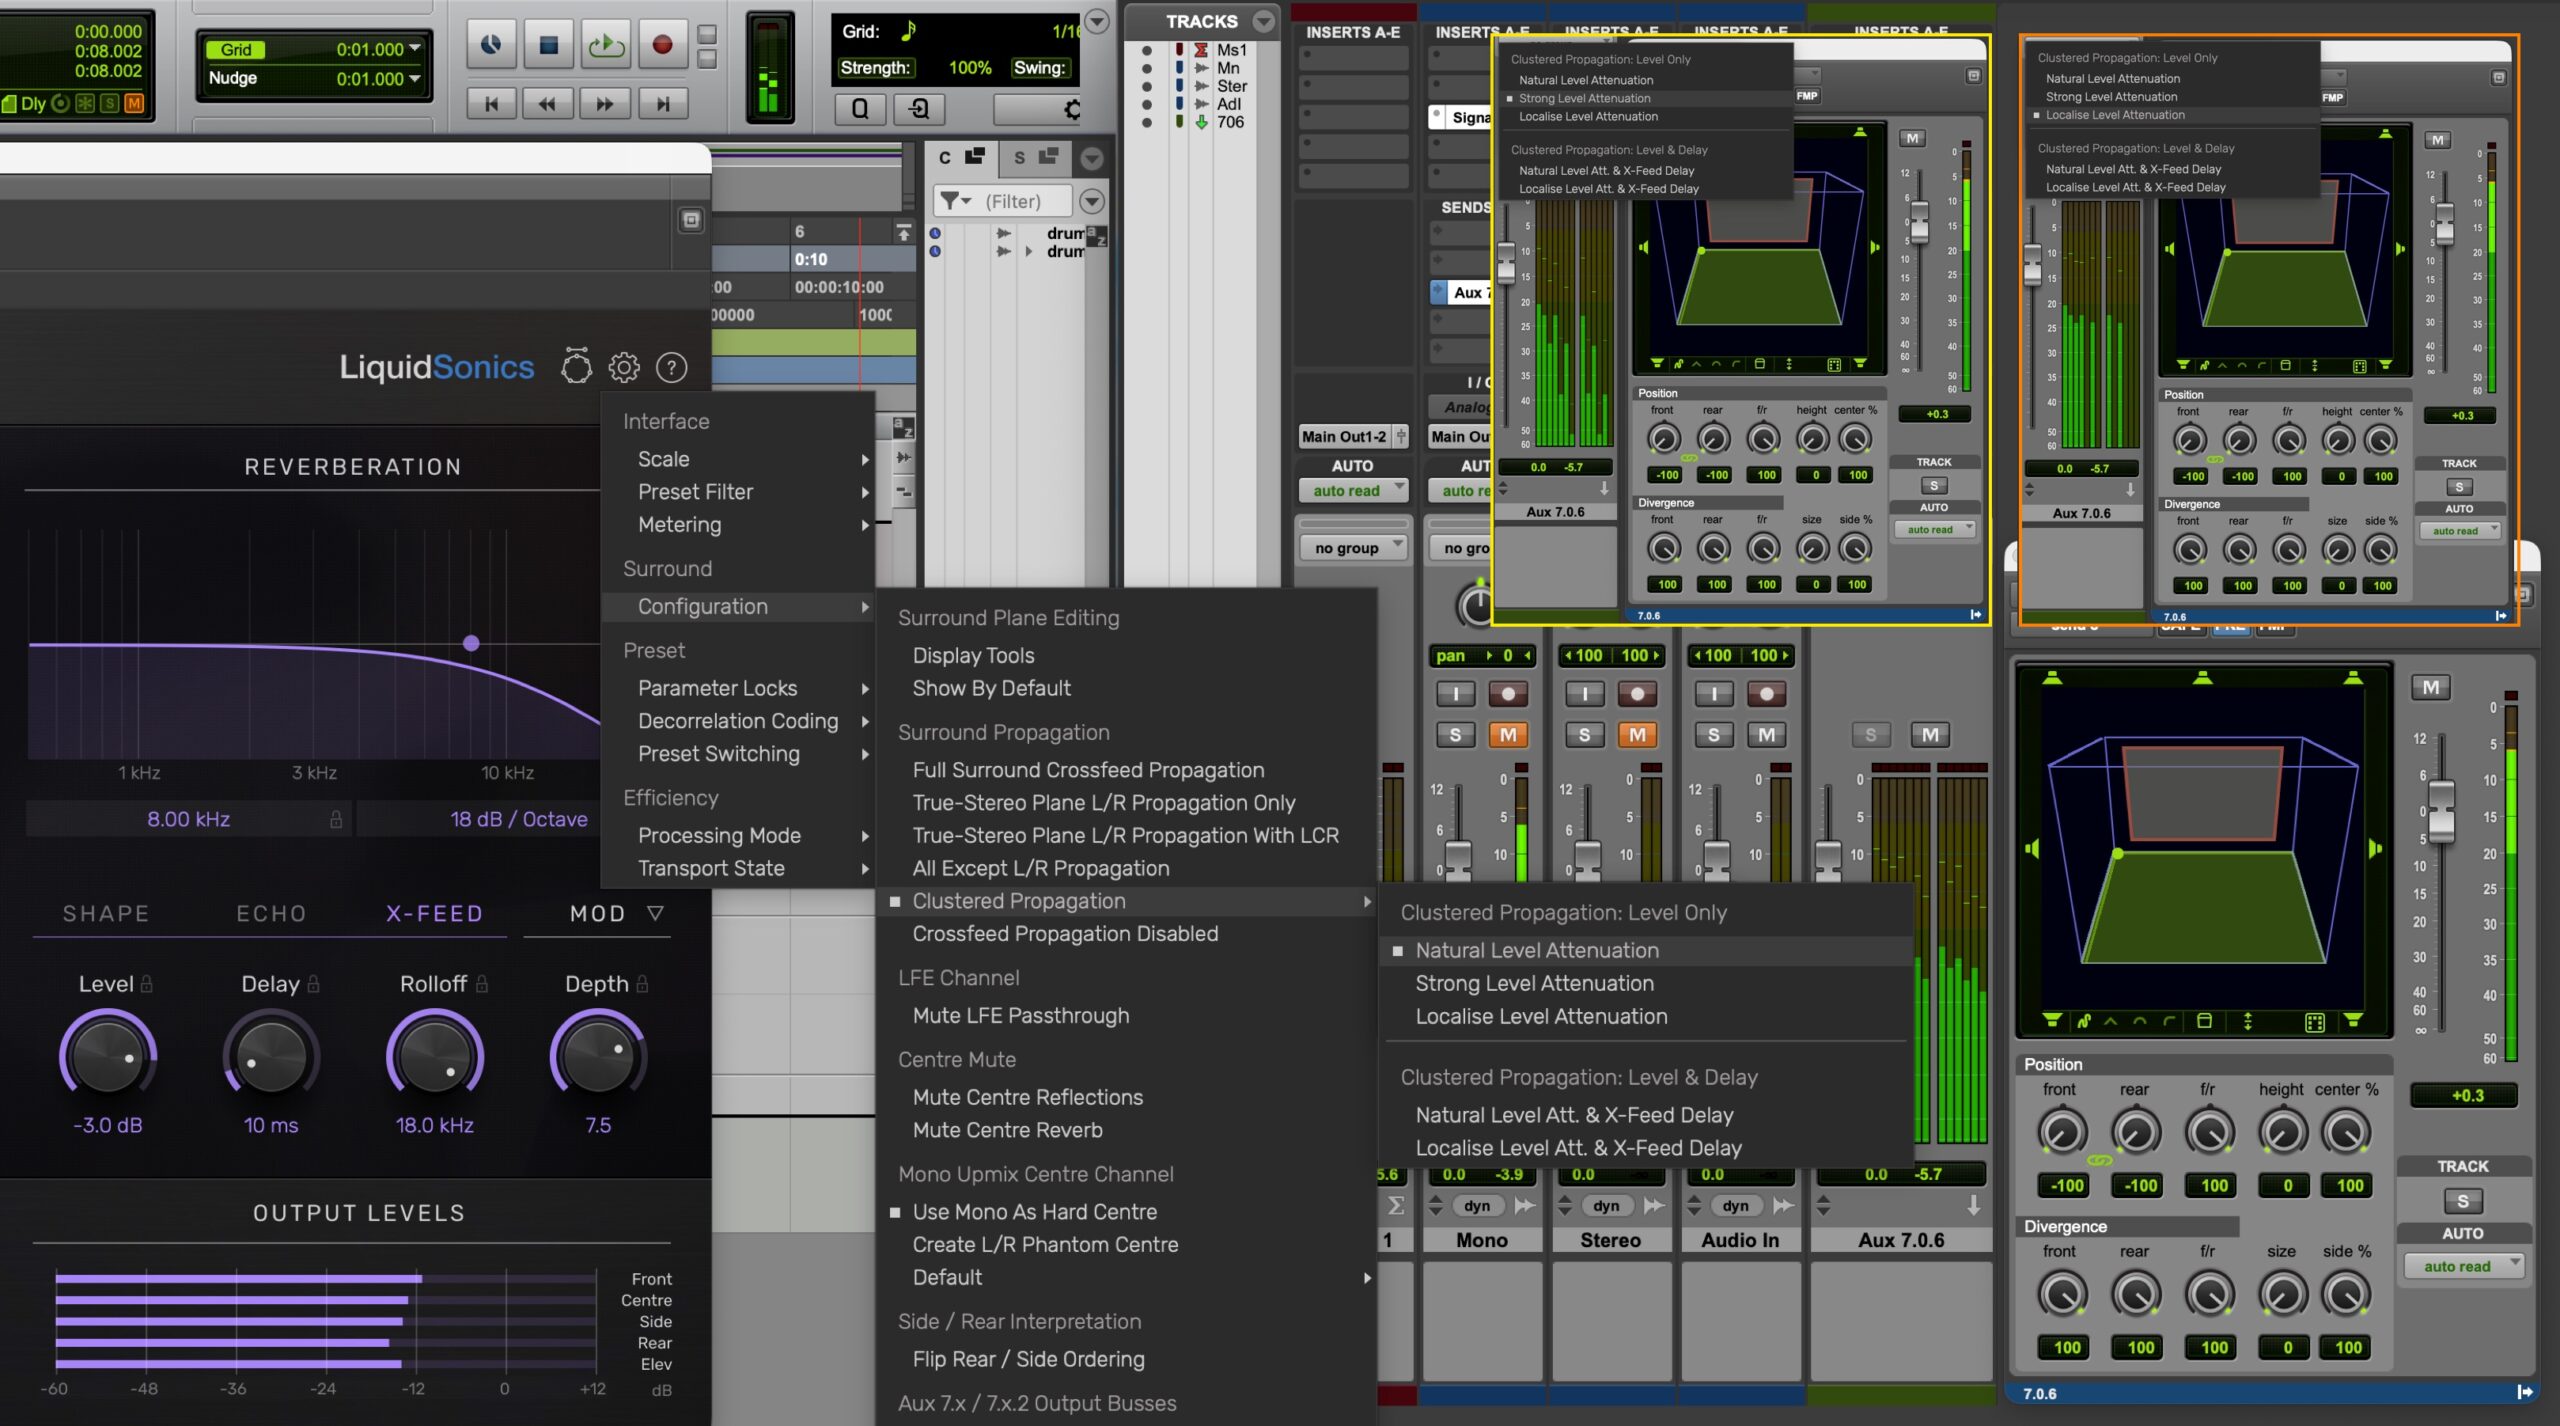
The three cluster propagation modes are available:
- Natural: Propagation into adjacent channels (e.g. front → side → rear) happens at a natural logarithmically decreasing level as one would expect from typical environmental sound dispersal.
- Strong: Propagation into adjacent channels (e.g. front → side → rear) happens at a rate faster than logarithmically so that distant zones fall off much more rapidly accentuating the effect.
- Localise: Propagation localises around adjacent axes, so for example along the left/right and front/back planes, but there is propagation across diagonals (front left to rear right). This helps to localise reverb to restrain the regions into which reverb and reflections are observed.
In the example below, we illustrate the differences between Natural, Strong, and Localise modes. The baseline image uses Natural at a low crossfeed level.
When switching to Strong (shown in yellow), note that the propagation fall-off between channels occurs much more rapidly. In the previous example, the decay followed a linear trend on a logarithmic scale (i.e., an exponential fall-off), whereas in Strong mode the drop-off is steeper than logarithmic and is highly sensitive to the crossfeed level.
Finally, Localise mode (shown in orange) restricts propagation to the front/back or left/right planes, eliminating any diagonal propagation ensuring that the crossfeed stays close to the source but is completely absent at a distance.
Level & Crossfeed Delay Modes
Two further modes are available that also influence the time delay of the crossfeeds. For instance a sound that presents on the front left would take longer to propagate to the left side than the left rear surround, and further still to the right rear surround.
The use of the variable crossfeed delays enhances the perception of size in medium to large rooms and in orchestral mixes benefits the overall sense of immersion in the space.
The timing value selected in the interface (e.g. 10ms) is anchored to a full left/right or front/rear transit, with intermediate points such as a side or centre channel taking a proportion of it based on location (e.g. 5ms for a centre or side). Positions representing further than a full transit (e.g. across the diagonal front left to elevated rear right will take proportionally longer than the base time).
These modes are exclusive to Cinematic Rooms Professional and Lustrous Plates Professional as they provide control over the crossfeed delay.
6. Mono channel isolation
Reverb will only present on channels that are receiving an audio signal. This is equivalent to the “multi-mono” mode that some hosts provide, but benefits include producing fully decorrelated reverb outputs and using less CPU/memory.

Note that these propagation modes are not available in HD Cart due to the heritage of the algorithm itself. The other LiquidSonics reverbs discussed here were designed from the ground up to support these capabilities.
Superior Pan Tracking
Once you have configured the propagation mode required, the level of the crossfed audio can be tuned using the appropriate cross-feed level controls. These facilities control how closely the reverb tracks the source as it pans around the space.
In Cinematic Rooms Professional you also have independent control over reflection and reverb propagation level, delay and roll-off filtering.

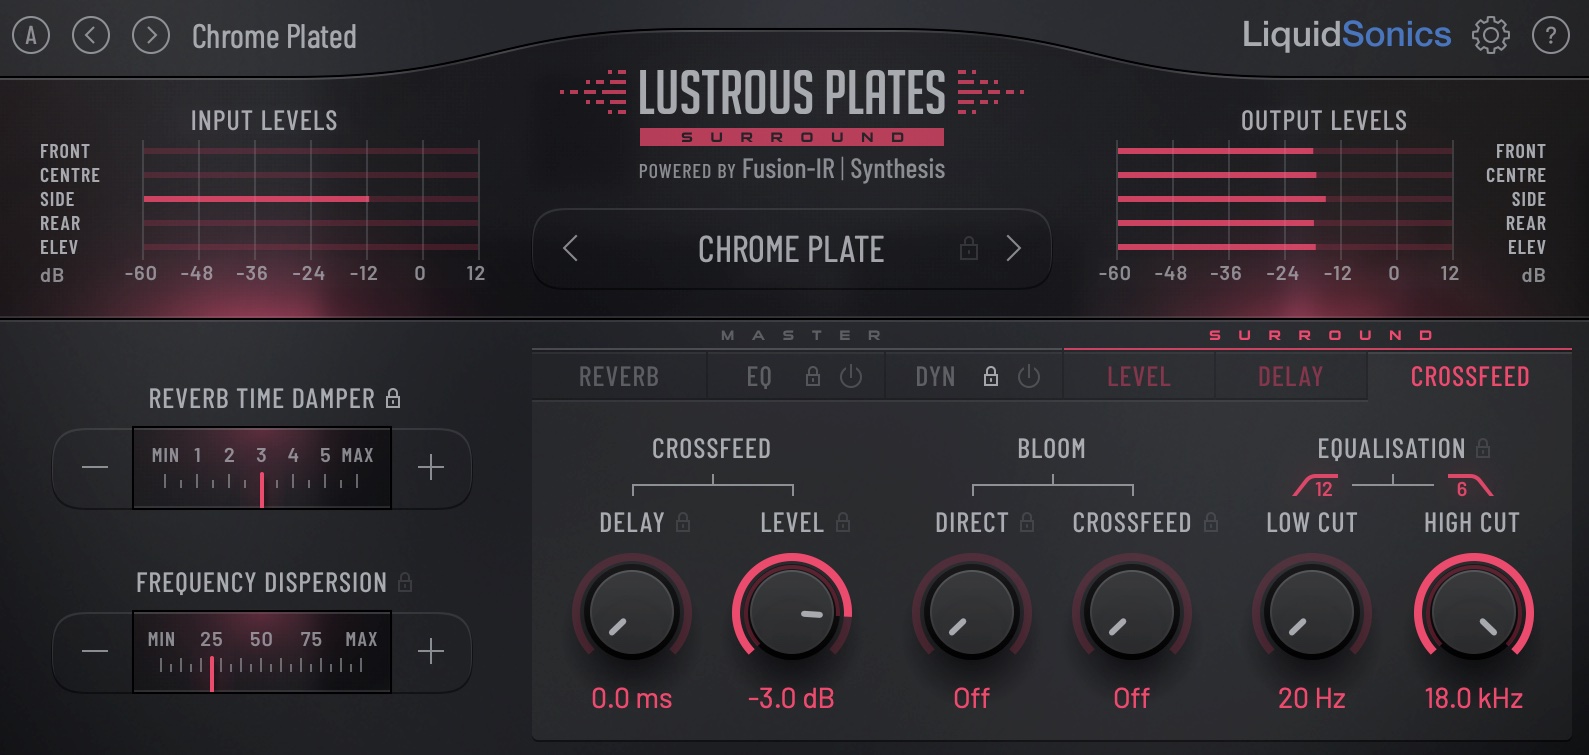
Lustrous Plates Surround provides some control over bloom and low cut for the cross-feed signals. Dialling in bloom for the cross feeds helps create a greater sense of size and depth across the stereo field.
Tai Chi and HD Cart do not provide dedicated control over pan tracking level.
Try LiquidSonics Reverbs For Yourself
All of the LiquidSonics reverbs are available to try for free for 14 days, just head to our demos page to drop a code into your license manager and pick up the installers from the downloads page.